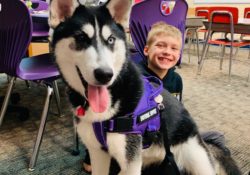
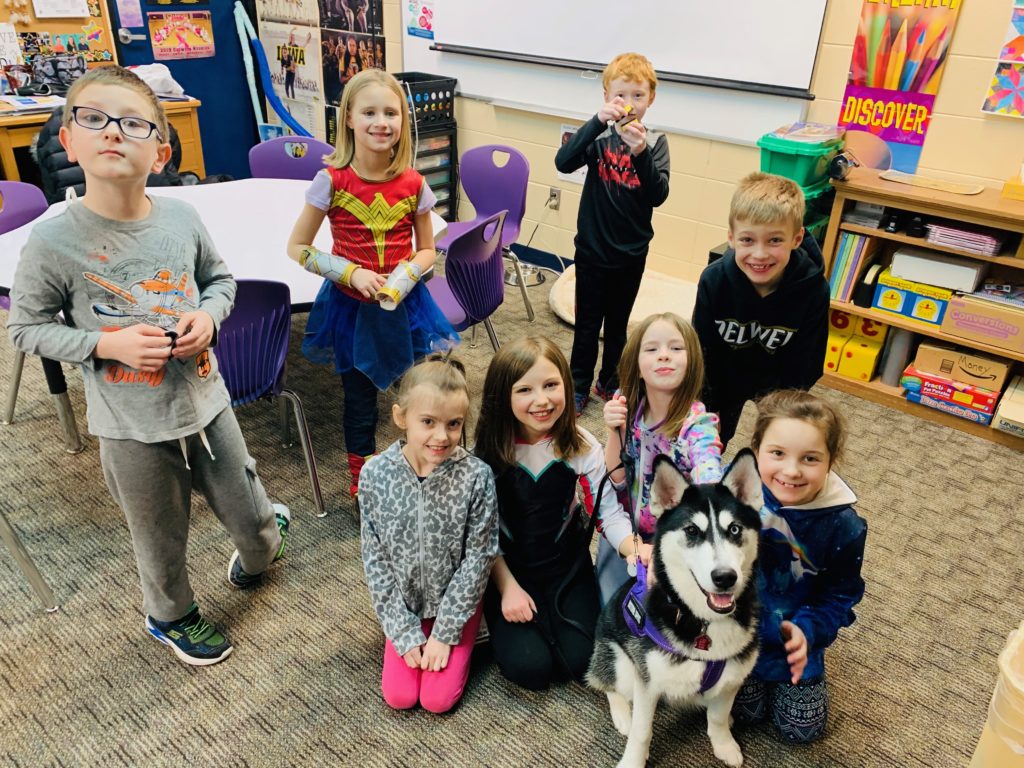
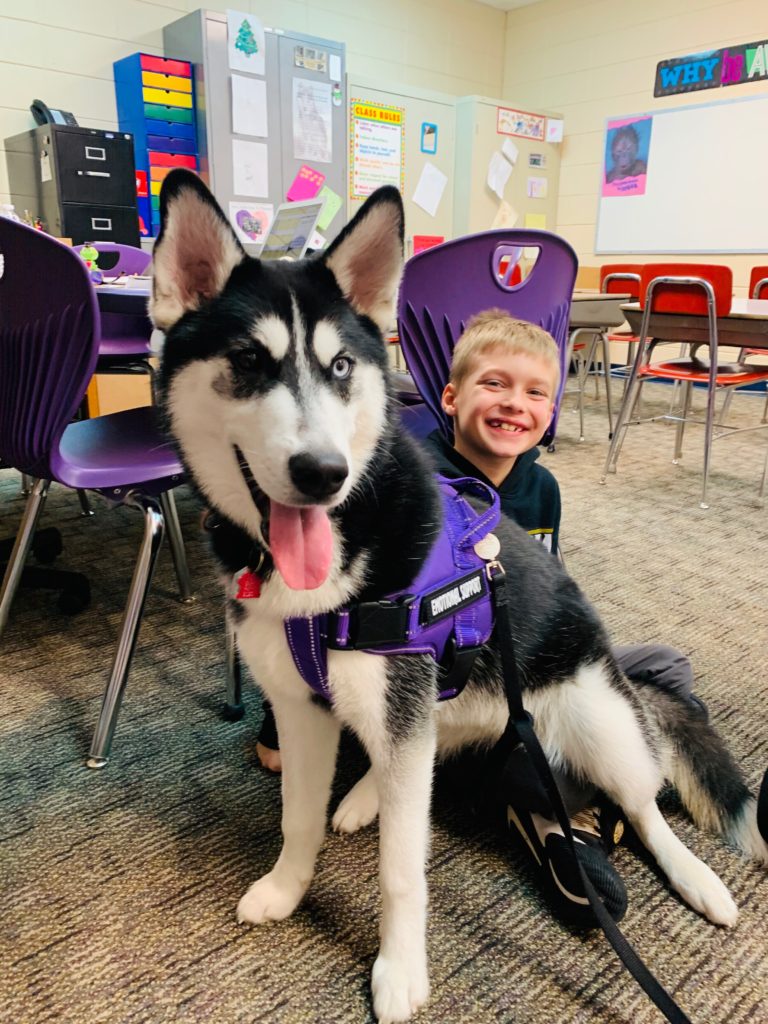
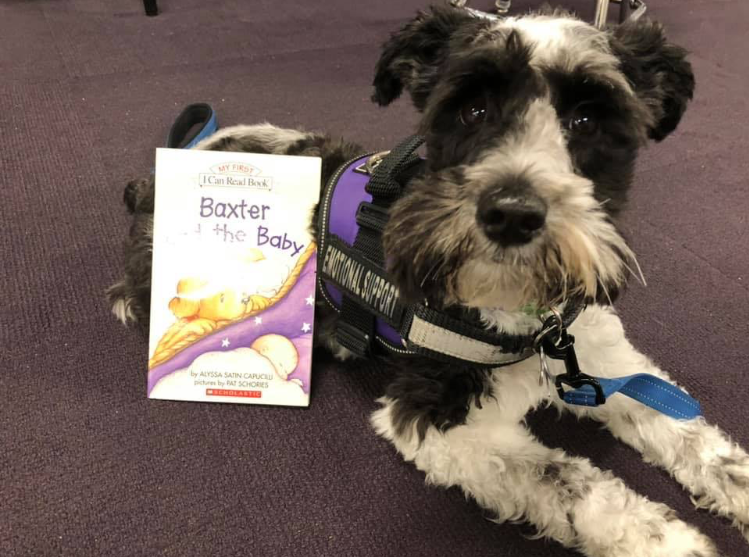
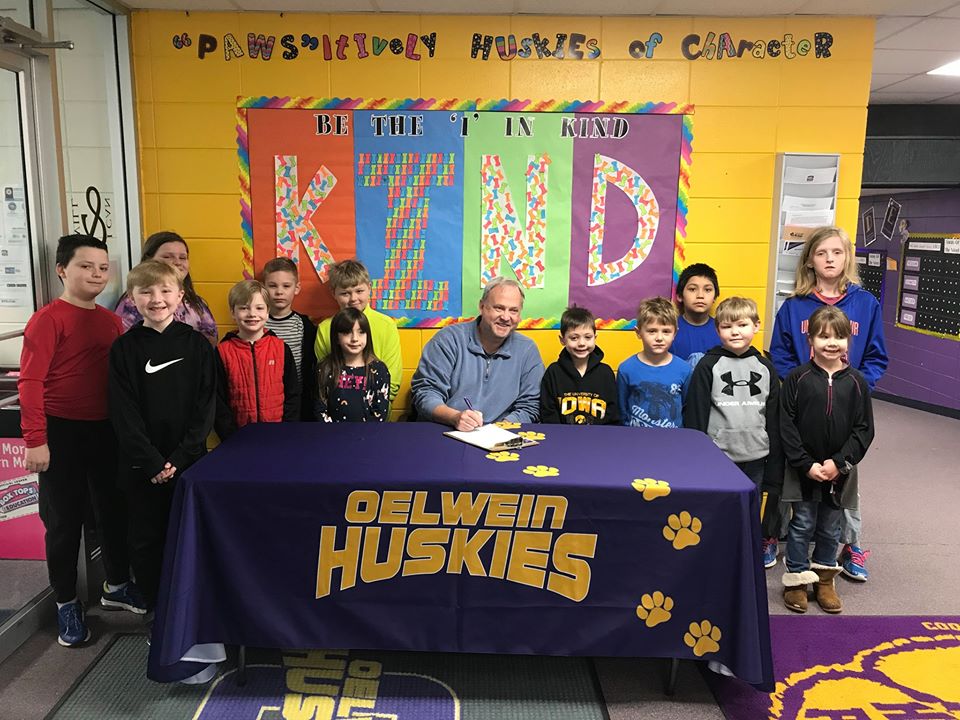
Have you ever wanted to bring your pet to work? Well…. it might just be possible. And it may just improve the overall physical and mental health of staff and students. It has at our school! Therapy dogs are taking over classrooms around the nation.
You see them all the time, practically everywhere you go. The hospital, courthouse, mall, airports, hotels…. Full-time therapy dogs in schools are a fairly new concept and are becoming increasingly more popular. Our school district now has 8 therapy dogs. Our superintendent is a dog lover but above all else, was inspired by the positive impact therapy dogs can have on students and students are his number one priority. Check out how our school uses therapy dogs!
https://www.youtube.com/watch?v=IWK9LFatknw
Therapy Dogs Vs. Service Dogs
It is important to note that THERAPY DOGS ARE NOT SERVICE dogs! I have to admit that when I made this video earlier in the school year that I didn’t know that there was a difference. I have since learned. There is a HUGE difference between service dogs and therapy dogs.
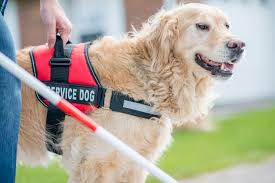
Service Dogs
A service dog offers assistance to its owner and is trained to specifically focus attention to its owner to the exclusion of all others. Service dogs are trained to offer specific support for individuals with disabilities such as visual, hearing or mobility difficulties or specific medical needs such as diabetes, seizure disorder, anxiety or PTSD. The role of a therapy dog is to react and respond to people and their environment under the guidance and direction of their owner.
Therapy Dogs
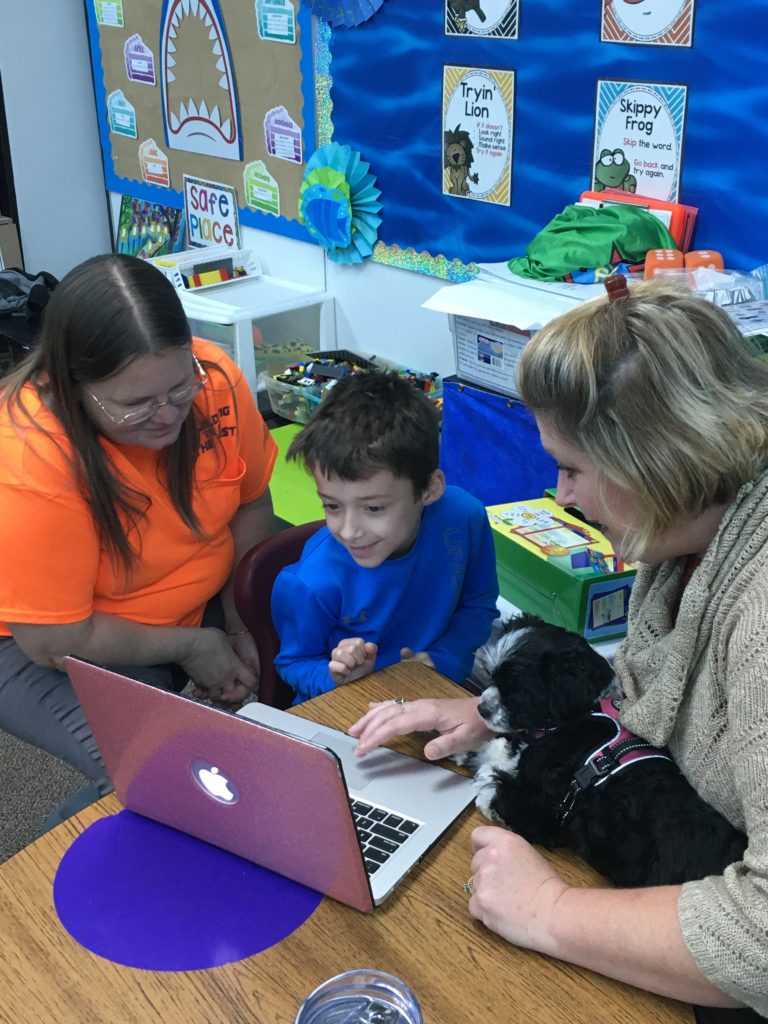
Therapy dogs can be used for specific animal-assisted therapy carried out by a trained counselor or health care professional. Healthcare professionals have been using therapy dogs for years. This aims to provide improvement for a person’s social, cognitive or emotional functioning. A professional who uses a therapy dog in treatment may be viewed as less threatening, potentially increasing the connection between the client and the professional. They can also be used in a more casual way, with animal-assisted activities. By just being present, available to pet and interact with students to improve emotional, physical or mental health just with the presence of a dog. These activities don’t need to be overseen by a healthcare professional.
What Does The Research Say?
Research suggests that therapy dogs in response to traumatic events can help reduce anxiety, depression and traumatic stress disorder. Just interacting with a dog can have a multitude of positive effects. Therapy dogs have been shown to physiologically reduce stress in humans by helping control cortisol levels. Cortisol can help control blood sugar levels, regulate metabolism, help reduce inflammation, and assist with memory formulation. It has a controlling effect on salt and water balance and helps control blood pressure. Interactions with a dog can also increase attachment responses that trigger oxytocin levels, a hormone that increases trust in humans. It has physical and psychological effects, including influencing social behavior and emotion. Research shows that it may benefit people with an autistic spectrum disorder (ASD) and anxiety among other things.
Benefits Of Therapy Dogs In Schools
Therapy Dogs Can:
Help teach empathy and appropriate interpersonal skills
Reduce Stress
Improve one’s skill to pick up social cues
Increase student engagement
Help improve social skills
Improve motivation to learn
Give students responsibility to take care of something other than themselves
Increase school attendance
Increase confidence in students
Decrease anxiety and undesirable behaviors
Enhance relationships with peers and build more trusting relationships
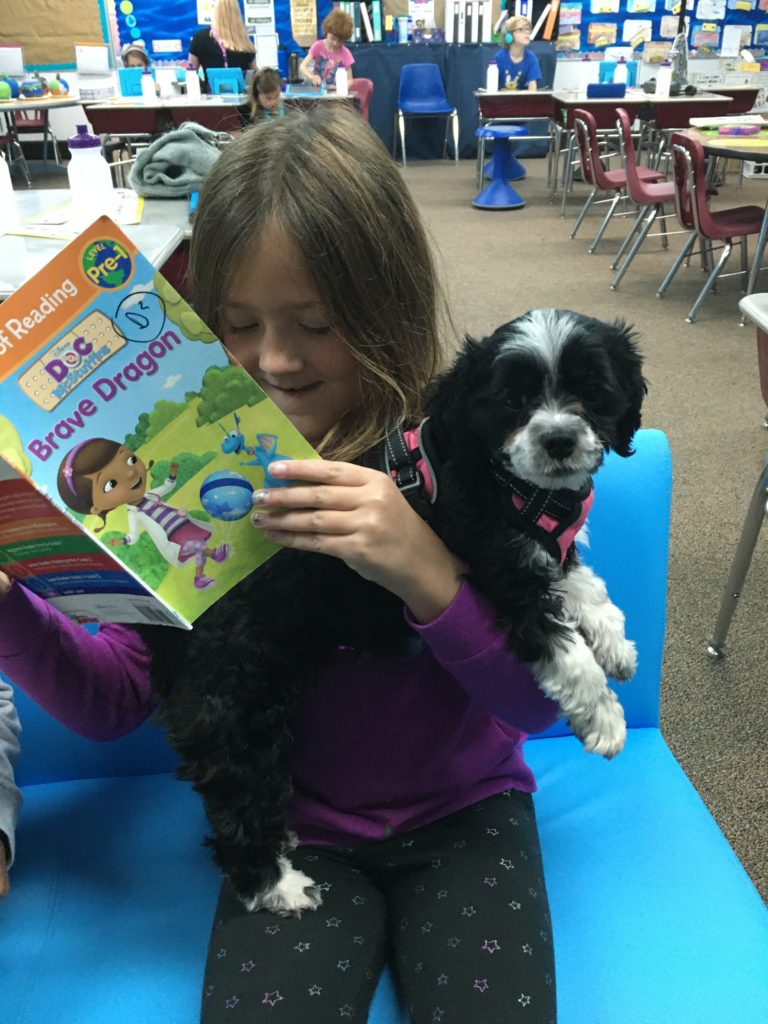
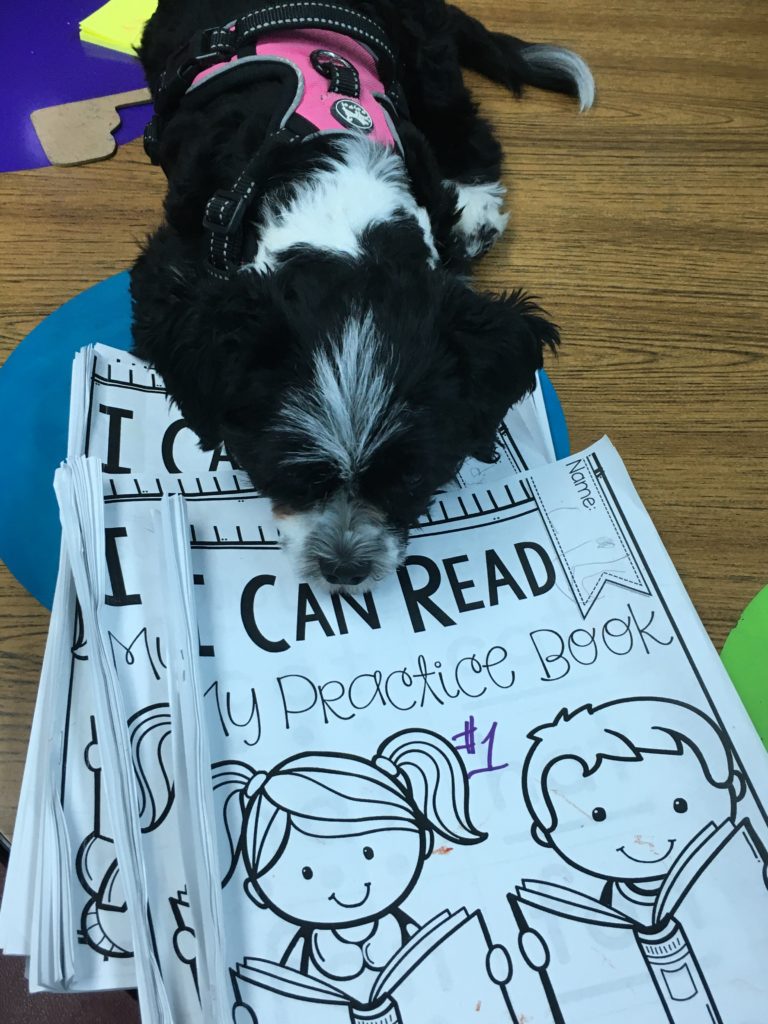
A recent report found that children who work with therapy dogs in school experienced increased motivation for learning, resulting in improved outcomes. In addition to being available to all students, therapy dogs in schools are also being used with students with social-emotional learning needs. This, in turn, has been linked to increases in literacy development. Research into the effects of therapy dogs in schools is showing a range of benefits including an increase in school attendance, gains in confidence, decrease in learner anxiety, positive changes towards learning such as increases in reading and writing scores and enhanced relationships with peers.
Aren’t Dogs In School Risky?
Despite the known benefits of therapy dogs in schools, some schools choose not to partake in the program due to some perceived risks. These range from sanitation concerns, allergy concerns and concerns of student safety due to temperament.
Dealing With Allergens
There is a certain protocol that is suggested that schools follow to help with students who may have allergies to dogs. First, there are certain breeds of dogs that are better for individuals with allergies. Hypoallergenic dogs refer to dogs that don’t shed much hair or dander. In the US there are 15 breeds of dogs that are considered the best match for allergy sufferers. These include the Affenpinscher, Basenji, Bedlington Terrier, Bichon Frise, Hairless Chinese Crested, Havanese, Irish Water Spaniel, Kerry Blue Terrier, Komondor, Poodle, Portuguese Water Dog, Puli, Giant Schnauzer, Shih Tzu, Wire Fox Terrier, Yorkshire Terrier. Click here for more options from the American Kennel Club (AKC).
It is also suggested to keep the dog’s environment and equipment (vests, dog beds, collars and leashes) clean and use anti-dander spray. Teach proper handwashing techniques to all staff and students will help as well. Luckily all schools have janitors that pretty much work around the clock including day janitors and night janitors that are constantly keeping our schools clean. Accommodations of meeting the student with allergies in an alternative location or keeping the therapy dog in a certain space. It’s also important to work with the student and parents to understand their specific needs.
Dog Temperament & Training
All school therapy dogs need to first get approval from the school board and school administration. They then need to go through the AKC’s S.T.A.R. Puppy (if under a year old) and Canine Good Citizen programs, in addition to more advanced work for therapy dogs. This assures that all dogs will have a temperament that is appropriate for a school setting.
They also need to earn a facility dog designation to learn how to respond to situations that are unique to a school building. For example, when you have lunches lined up in the hallway, you have to make sure that the dog knows to not poke his head in everybody’s bag, Or what happens when a fire alarm goes off, or noises such as kids laughing, balls bouncing and there is a hallway full of kids wanting to touch them.
Our therapy dogs work with a certified dog trainer. They start out at his facility then move into training in a school setting with the trainer and owner. In addition to passing all temperament tests, our dog trainer has our dogs go through, they also need to be approved by our local Paws Board in our town.
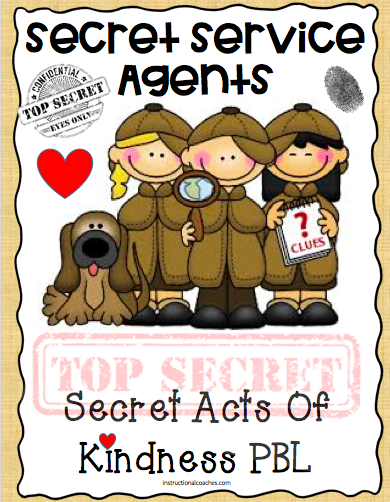
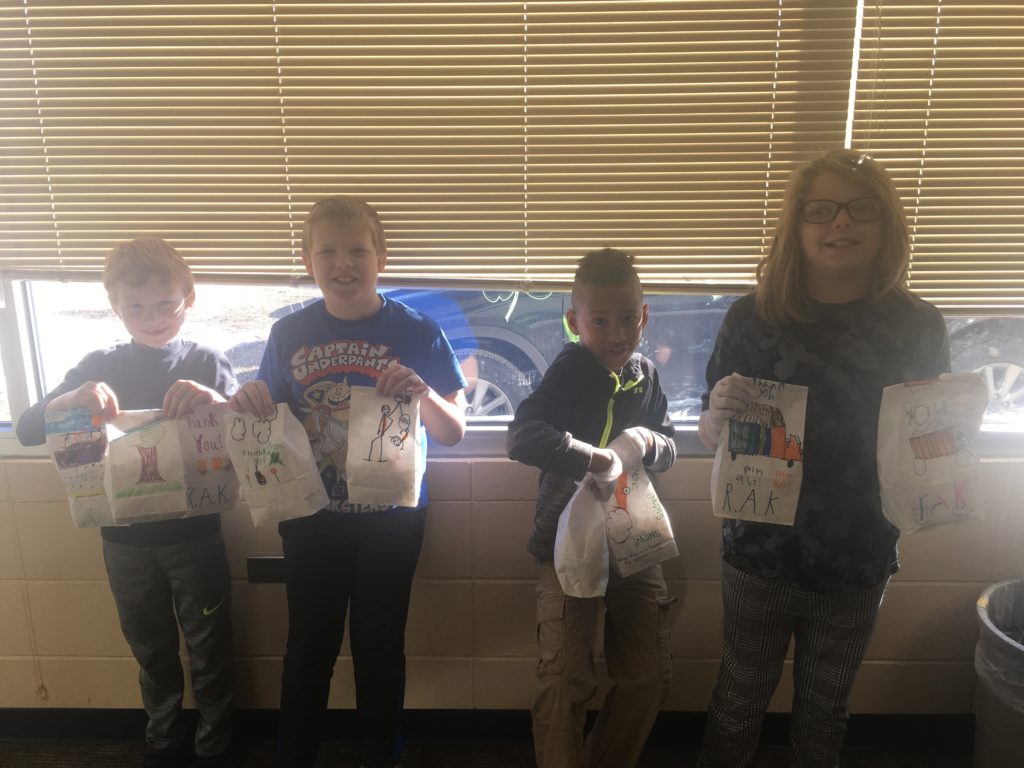
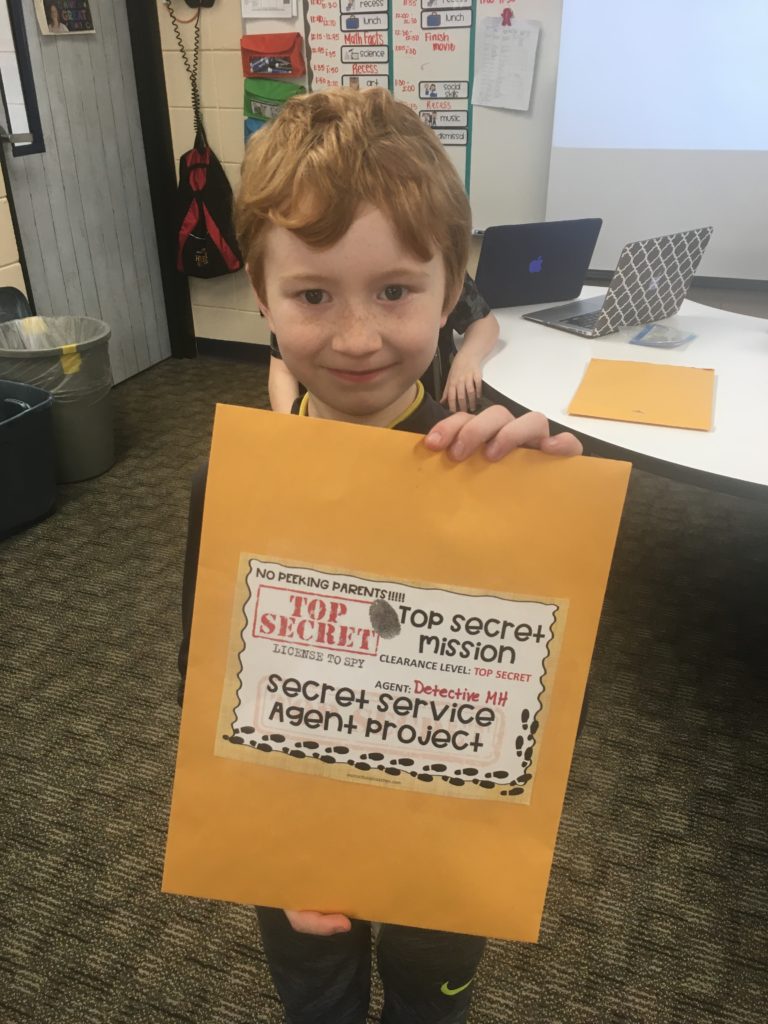
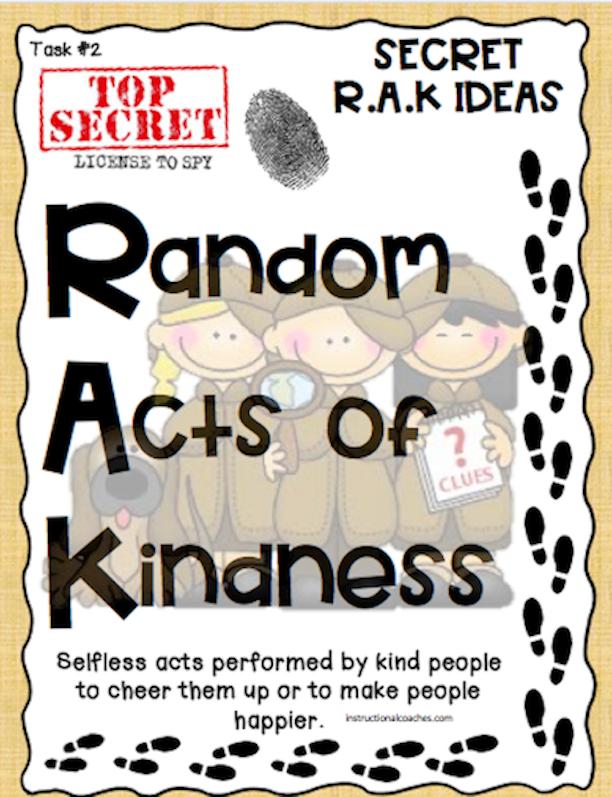
The Secret Service Acts of Kindness PBL is a super fun and super rewarding kindness project. As a 3rd grade teacher, one of my very favorite projects that I have ever had my students participate in was the Secret Service Acts Of Kindness PBL. My students became real secret service agents. They were given a seven-day kindness challenge in a top-secret envelope that only they were allowed to see.
Ssshhhhh, It’s A Secret!
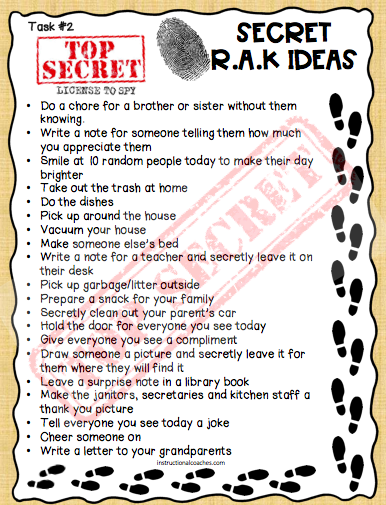
The students couldn’t share it with anyone, not even their parents! They had to come up with one kind act that they could perform secretly for anyone of their choice either at school or home for each day of the challenge. With Valentine’s Day coming up and Kindness week of 2020, I thought this would be a perfect time to share this amazing kindness project. Many of our schools around us are choosing to forego Valentine’s Day parties this year and are replacing them with kindness parties. Our school is choosing to participate in both:) Click here to download my full Secret Service Agents Of Kindness PBL.
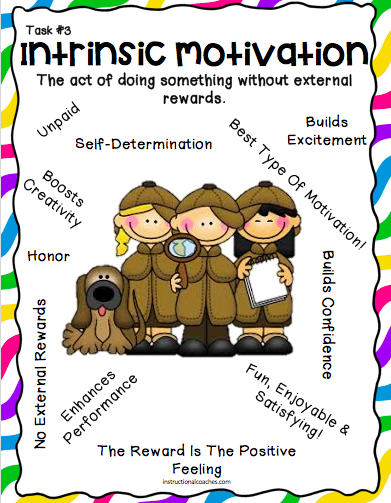
The Secret Service Acts Of Kindness PBL was initially designed to get students to show more kindness to others both in and out of the classroom. My goal was to build intrinsic motivation within my students to show others kindness. To my surprise, the students took off with their top-secret mission and begged me for more. They came up with the idea of extending this to classroom kindness secret agents where we would secretly show kindness to other classrooms. In thinking how we could extend this even further to make this a true PBL, I created the community kindness portion where we would secretly show our community members who do a great job daily to help keep our community safe and clean but probably never get thanked for it.
Kindness Can Happen Anywhere
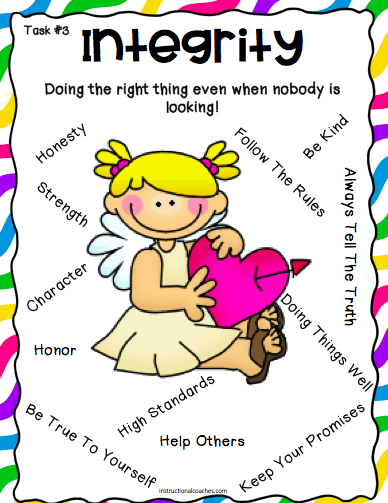
The Secret Service Acts Of Kindness could take place anywhere, at school, home or out in the community. We choose to complete this project in all three places. The trick was that the students were undercover and couldn’t get “caught” in the act. They had to perform all acts of kindness in secret. The purpose of this was to teach them that they should do good things for others without expecting anything in return. Not a smile, money, gift, points of any sort or even positive praise. They should do kind acts because they are the right things to do, even if nobody notices them. Integrity is a great vocab word to teach with this thought.
The Secret Service Agents Of Kindness Made Treats For Our Snowplow Drivers
The Goal:
My goal with the secret acts of kindness project was to build a positive classroom culture with students who care about others. Not that my students didn’t care about each other or had a hard time showing kindness, they did. My students were all great kids, I just wanted to amplify it. Kick kindness up a notch and make it contagious! The Secret Service Acts of Kindness project not only improved my classroom climate and culture but the entire school climate and culture.
Hello Motivation!!!!
This project taught my kids the value of intrinsic motivation and was a big hit with my 8-year-olds! And boy were they motivated!!!!! In fact, the one week challenge turned into a full school year challenge! They had so much fun with it that they begged me to keep it going the entire school year!!!! As a teacher, this was a really proud moment! In fact, I am now an instructional coach and still have kids that participated in this challenge (that are now in high school) come up to me and bring up the Secret Service project to tell me how fun it was.
Kindness Is Good For Our Health
Although it can feel like children often behave in selfish and self-centred ways, they are not. In contrast, children are actually hardwired to be kind. But, more than that, our brains and bodies have in-built mechanisms to encourage us to be kind. When we are kind to others our brain’s reward centers light up as our bodies release the happy hormone dopamine. This is why people often report experiencing a ‘helper’s high’ after volunteering. According to research, being kind not only feels good but can also be good for our health too. When our minds are happy our bodies release what some experts call the cuddle hormone or oxytocin. This hormone is known to lower blood pressure and protect our hearts.
Small Acts Go A Long Way!
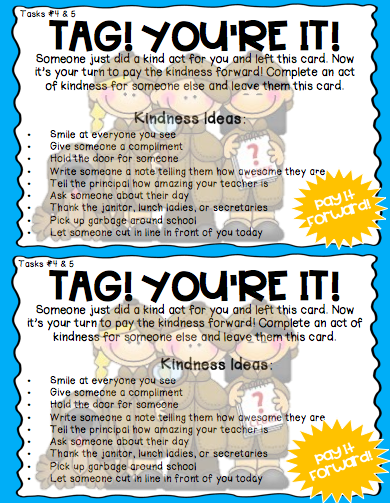
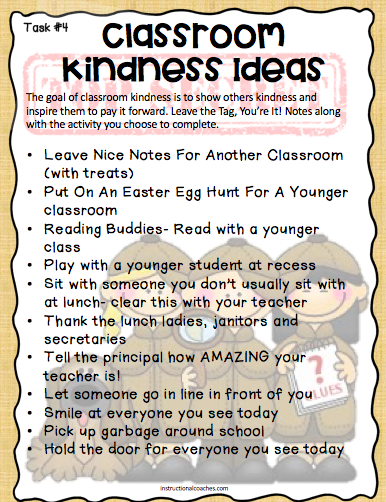
I wanted students to know how their small kind gestures can impact others in a positive way. That kindness is contagious and one kind act can inspire other kind acts. A pay it forward, chain effect of good deeds. I also wanted students to intentionally show kindness to each other so that it would eventually become automatic. To show them that even the smallest act can go a long way for someone. Small acts of kindness can turn someone’s day around or even make someone’s day better. I came up with a Tag, You’re It! pay it forward tag that we would leave when we completed a kind act for another classroom and in the community. This would hopefully inspire others to continue the kind acts for others.
Secret Service Project
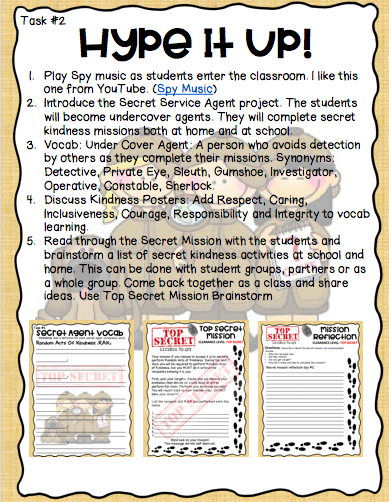
Hype It Up!
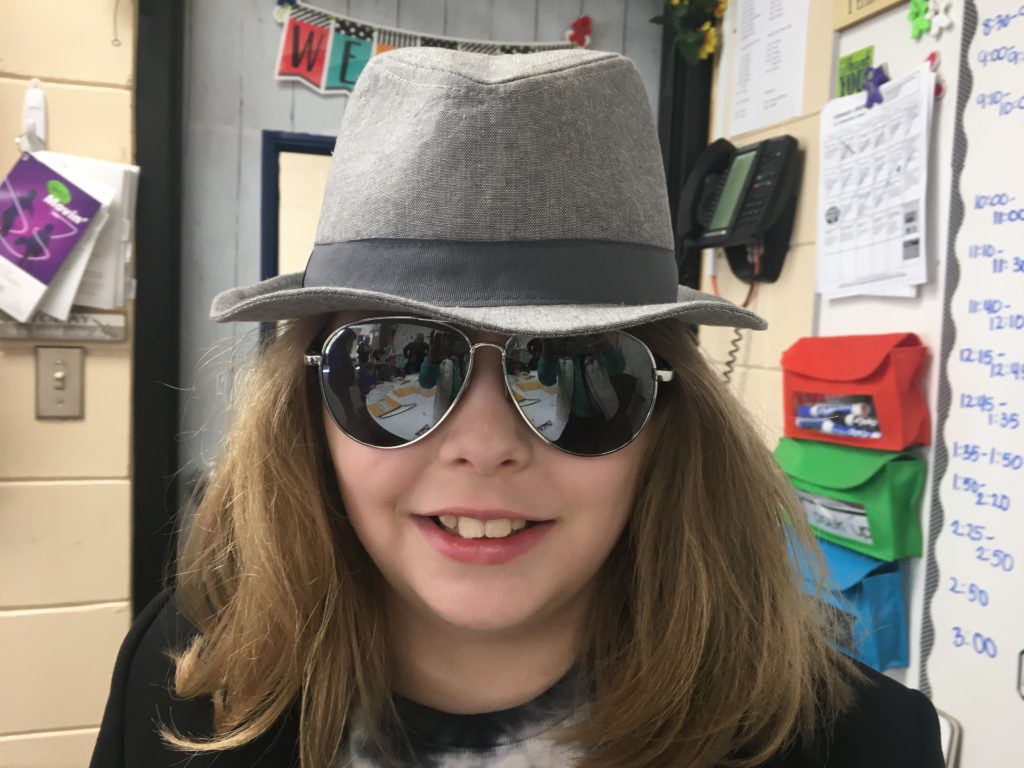
A good intro is always a must when starting a new project that you want the kids to take off with. Getting the students excited about becoming secret service agents was SUPER easy! I mean, what kid doesn’t like to sneak around? I’ve never met one that doesn’t. Trust me, this was super fun for all of the adults involved too! The students freaked out (in a good way) with the thought of doing secret acts of kindness without their parents knowing.
This was a great teachable moment with when to keep secrets and when to alert someone for safety reasons. With most things in life, students should not keep secrets from their parents, this was just one little exception. To hype the intro up further, I like to play SPY music so that the students really get the feeling of being undercover. Click here for some good Spy music.
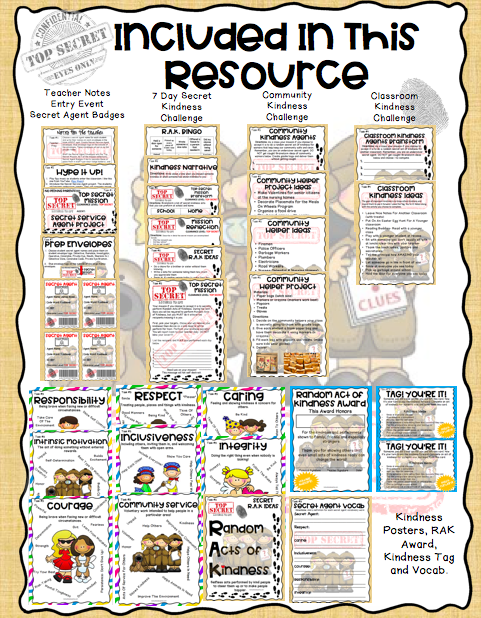
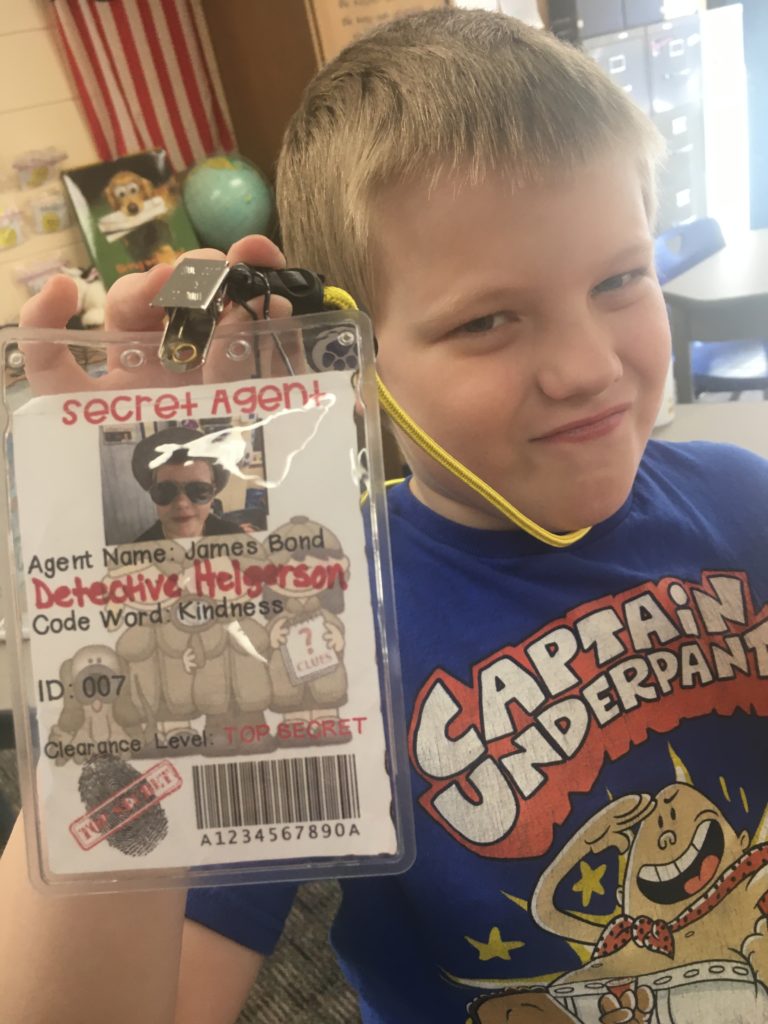
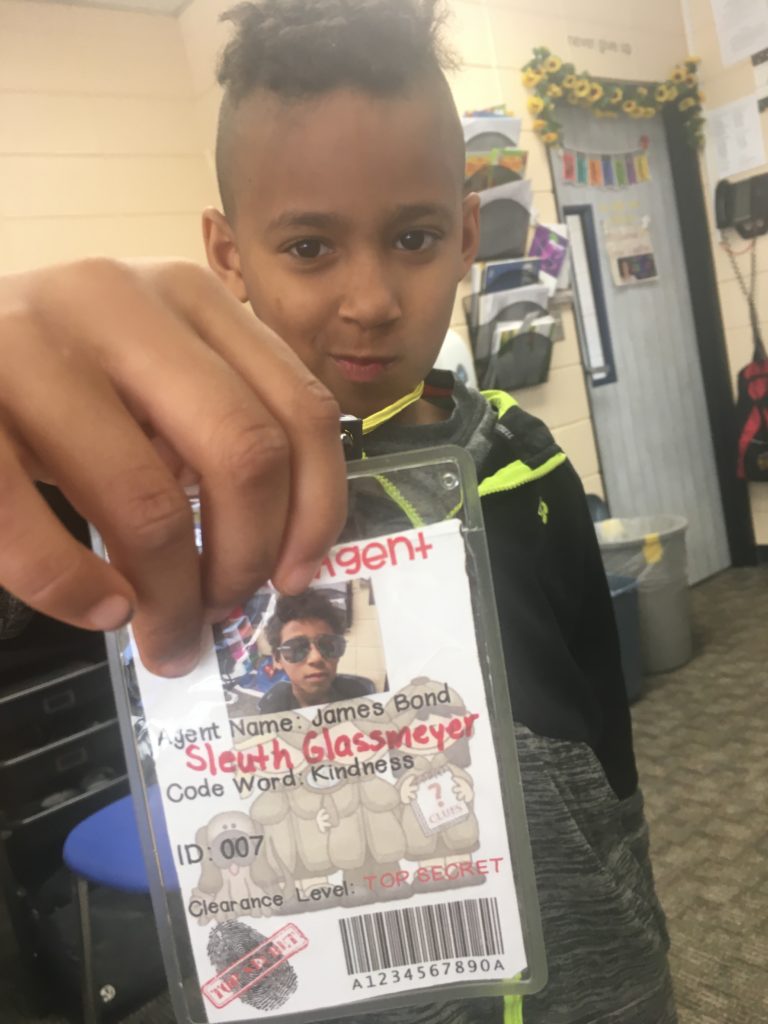
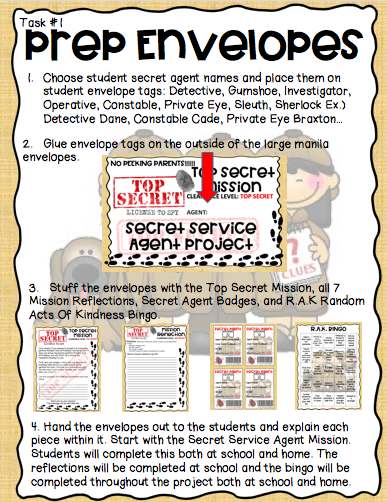
As students came in the classroom they found large manilla envelopes on their desk containing their 7-day challenge, reflection forms, Secret Agent badges in staff type badge holders and kindness bingo. This envelope served as the project folder that students used throughout the entire project.
Mark each envelope with student names and one of the following detective titles:
Detective
Gumshoe
Investigator
Operative
Constable
Private Eye
Sleuth
Sherlock
I like to make student’s names rhyme with their detective title, but some names are difficult so I rhyme as many as I can then just fill the rest in with titles that haven’t been used yet. Instead of writing on 25 different envelopes, I created envelope tags that can be glued on the outside of each. This made things a lot simpler. Just remember to write the names in red first before glueing.
Define Kindness:
I started this project by defining what kindness is, what it looks like and how it makes people feel when someone is kind to them. I created 7 vocabulary posters which include respect, caring, inclusiveness, courage, responsibility, integrity and community service. The students easily came up with many different ways people have shown them kindness. This can be done in a partner, small group or large group scenario. I would just suggest that in the end you come together as a large group and add all ideas onto one poster to serve as a reminder of kindness. I like to add kindness ideas to the poster throughout the project, which is a great resource for students to pull inspiration from.
Incorporate Writing
This was also a great opportunity to incorporate narrative writing. I had the students write about a time when someone showed them kindness or when they showed someone kindness. We then shared the stories whole class and added ideas to our kindness poster.
In addition to defining kindness, I also taught my students about the difference between intrinsic and extrinsic motivation. It may sound like it would be a bit above the heads of 8-year-olds, but it wasn’t. They really understood and grasped on to the idea! This project requires intrinsic motivation or the good feelings we get by doing good things, the right things and trying our best.
Brainstorm
I started out by defining Random Acts of Kindness. We then brainstormed a list of ways we could show kindness to others both in school and at home. My students came up with tons of ideas of simple things that could show kindness. I made a T-chart that we recorded our ideas on. One side was what we could do at school and the other side was ideas that students could do at home. The students worked with their small groups first and came up with random acts of kindness for each. We then came together as a large group and added it to our classroom poster.
On the home side of the T-chart, the students came up with things like:
Since every child’s home life is different, before brainstorming a list of secret acts of kindness as a class that students could complete at home, I had them brainstorm ideas on their own that would fit their specific situation. We then added their ideas to a group list to give others ideas. The challenge was set up so that each student needed to plan 7 ideas they could secretly complete for each day of the challenge. This was the start of their TOP SECRET MISSION. Once each student had a plan ready to go it was up to them to follow through.
Daily Reflections:
As a teacher/coach I really don’t like to do random projects without connecting them to our state standards. The secret service project lent itself really well to incorporating narrative writing. Each day during our work on writing Daily 5 round the students had to fill out a challenge reflection which summarized their R.A.K. completed the previous day. One prompt that I used was; Describe a time when someone was kind to you. Reflection is a huge part of growing as an individual and helps build intrinsic motivation. Remember, that’s what we are aiming for.
Every day I had my students write about their experiences in implementing this project. They had to reflect on the secret service kindness act they performed. This included describing what they did, who for, how that person reacted and how it made them personally feel. I also had my students share their stories with their classmates, partners, groups and whole class. This really helped other students with gathering more ideas than they could possibly implement.
Classroom Kindness Agents
With this project, kindness starts in the classroom. My students came up with the following secret kindness ideas that we could complete as a class at school.
Growth Mindset Jar
The students came up with the idea of starting a compliment jar, which turned into a growth mindset type jar that students would pick out of to start their day off with. I found inspiration for the Growth Mindset jar from one of my favorite blogs, Clutter Free Classroom. This blog is seriously AMAZING!!!!
This was really easy to set up. I literally just found an old glass jar that was lying around at home. Then, I had the students cut up different colored pieces of paper and let the student’s research to find some growth mindset quotes. I also let students come up with their own positive words to encourage others. This is a great opportunity to teach lessons on a growth mindset vs. a fixed mindset. This was also a project that I invited our school guidance counselor and our success coach in on. These ladies were great and extended the growth mindset lessons in guidance class. They also worked in mindfulness lessons, which were a great connection to this project.
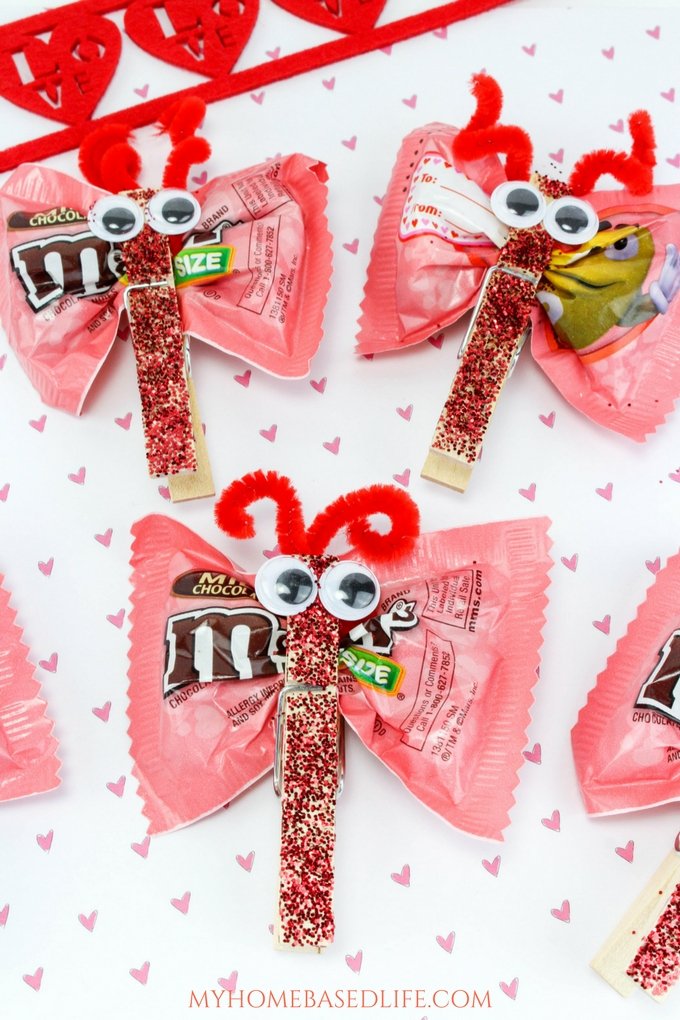
In coming up with a classroom growth mindset jar, the students wanted it to become bigger and I really think they wanted to secretly sneak around our school. They had the idea to make growth mindset type notes for other classrooms that they could secretly put on student’s desks when they were out of the classroom. Since they were already researching growth mindset quotes, this was an easy activity and a fun one for the kids. I just had to make sure to have plenty of colored paper slips cut. I also allowed students to write their own positive messages like, “Have a great day!”. Sometimes we would leave a treat (like a candy cane at Christmas or candy butterflies in February) with the notes. There are TONS of ideas like this on Pinterest.
We didn’t tell the teacher or any of the students. Remember, in order to keep it secret we couldn’t tell anyone, not even the teacher. It was pretty difficult for the students to keep this a secret. They really wanted to tell everyone. This was a great indicator to me that they were definitely motivated by it. But…. I could tell that the secret part needed a little practice. We ended up completing a secret act of kindness to all the classrooms in the building without getting caught in the act, most of the time. I found that it was fairly difficult to sneak 25 students into classrooms without actually getting caught. For the most part, we succeeded. The teachers eventually figured out where the notes were coming from. The students had no idea until we revealed our secret identities after the first few notes.
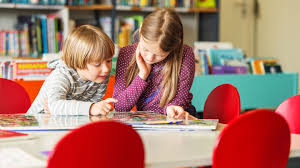
As some of the older students in the building, they also wanted to set up a big brother, big sister type relationship with a younger class. They would read with younger students, plan fun craft projects to teach them, play board and card games with them during inside recess and take a few minutes at the start of their day just chatting with their person, in a mentor-type role. All of the teachers were more than willing and excited to help make this happen. All of their ideas seriously made my heart melt and were ideas that I hadn’t thought of so of course, I had to help make them happen!!!!
Community Kindness Agents
All good PBL’s (project-based learning) opportunities involve a real-world connection. In addition to kindness serving as a must-have life skill, I wanted to get the kids involved in thinking about workers in our community. Workers that might do an amazing job keeping our community safe and thriving, but don’t ever get thanked. Workers such as the sanitation department, transportation department, road crews, police officers, firefighters, nurses, electricians, teachers, plumbers, janitors, secretaries…. the list could literally go on forever! So again, I had my students brainstorm their list of who they felt may be underappreciated. Those who do their jobs and do them well because it is their job but may be underappreciated.
Once we came up with a list it was time to decide what we wanted to do to show them that we care. A secret random act of kindness. Remember, we are still secret agents here! Students decided to create treat bags that we would secretly deliver. They designed small brown paper bags with thank you messages and filled them with popcorn, candy, and the Pay It Forward message tag that was connected to our class kindness hashtag so we could track the chain of kindness. Students LOVE to check our hashtag so we checked it daily.
The Great Kindness Challenge
In lou of national kindness week of 2020, which officially starts on February 11, 2020, our school is participating in the Great Kindness Challenge. This challenge is all about empowering students to create a culture of kindness. The Great Kindness Challenge is a positive and proactive bullying prevention initiative for PreK-12 schools. Schools that participate in the Great Kindness Challenge are automatically recognized as a Kindness Certified school. This is an initiative that started small but has now spread all across the world.
The goal is to help transform how kids view and treat each other by engaging in small, simple acts of kindness. Acts such as smiling at each other, holding the door for someone, giving someone a compliment, hug, high five or anything that can make someone’s day a little better. This is a great way for teachers to help students spread compassion and think of others. The great thing about this is that kids can inspire adults to be more kind. Kindness is contagious!
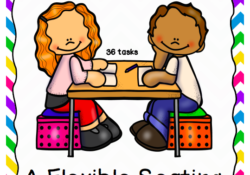
The Starbucks Classroom PBL is a flexible seating project-based learning opportunity. What is flexible seating? As a teacher, you know that flexible seating is EVERYWHERE!!!! It is usually designed and implemented by the classroom teacher, without much if any help from students. Flexible seating has many benefits in classrooms. It gives students the choice and comfort that traditional seating fails to offer. Flexible seating could include beach chairs, exercise balls, wobble chairs, floor pillows, tall cafe tables, standing desks, and much more. Flexible seating options differ from classroom to classroom, but it’s all based on the same idea. The idea is to give students flexible seating options to improve comfort, increase student choice and allow more movement during learning, thus improving engagement.
What Is A Starbucks Classroom?
Starbucks Classroom
A Starbucks classroom is a classroom that is designed with the same concept as your favorite Starbucks restaurant. This includes multiple flexible seating options. It is a relaxed environment that is not only conducive to learning but one that invites communication, collaboration, and creativity.
Why Turn It Into A PBL?
https://www.youtube.com/watch?v=MPsmCrX7IfQ
Why not is the question that I will ask! Inspiration for a PBL can come from anywhere and is usually created based on a need. Why not turn what you were already going to create into a real-world learning project for your students? I consider it a double bonus. A real-world learning experience for your students and in this case, custom flexible seating for your classroom. The Starbucks Classroom PBL was designed based on the need to find comfortable flexible seating for all physical and sensory needs.
The Role Of A PBL Teacher
PBL involves changing teacher practice. In a PBL, students take the reins, and teachers are encouraged to take on more of a facilitator role. In a high-leverage PBL, the teacher spends most of their time organizing, probing students about their own sense-making and acquisition of skills, promoting critical thinking, growth, and engagement, and planning instruction based on need and understanding students. PBL teachers encourage student voice and choice. The best PBL teachers seek to understand their students, then create a driving question and plan instruction based on student needs. They also set high standards and require students to use evidence to back up their thinking.
Inspiration For This PBL
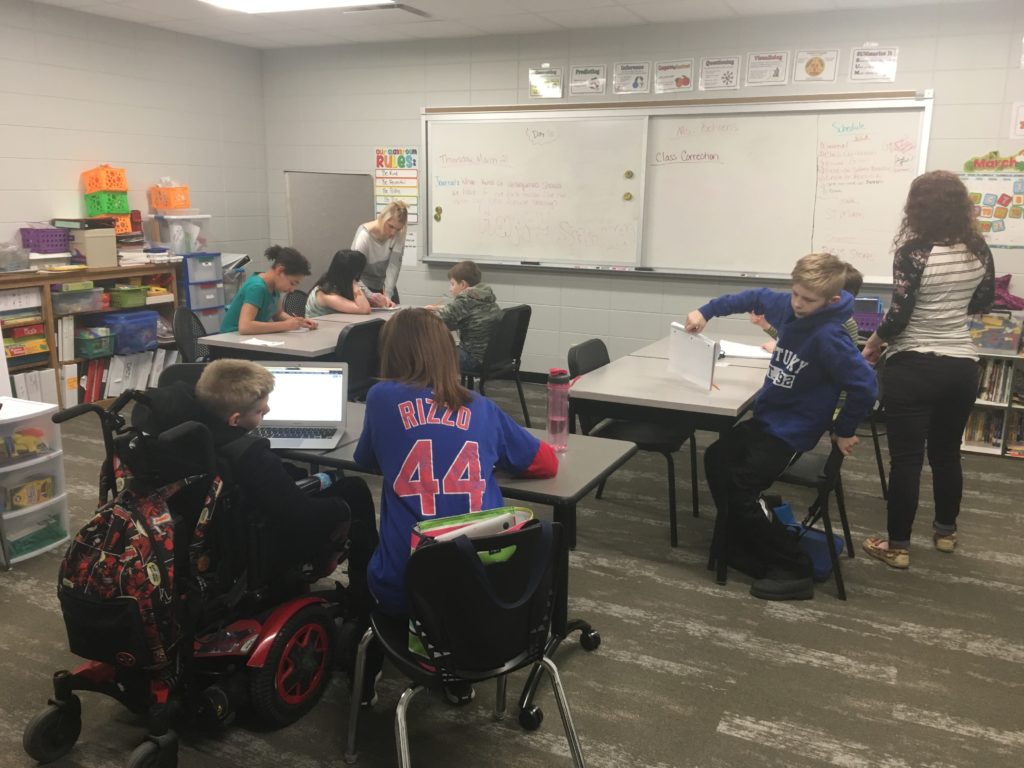
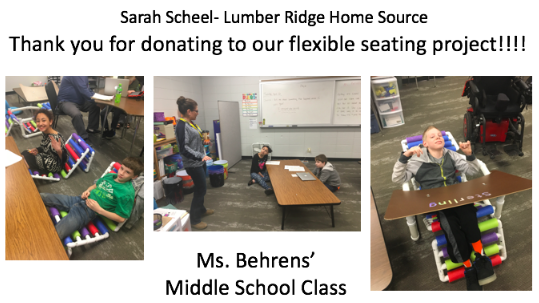
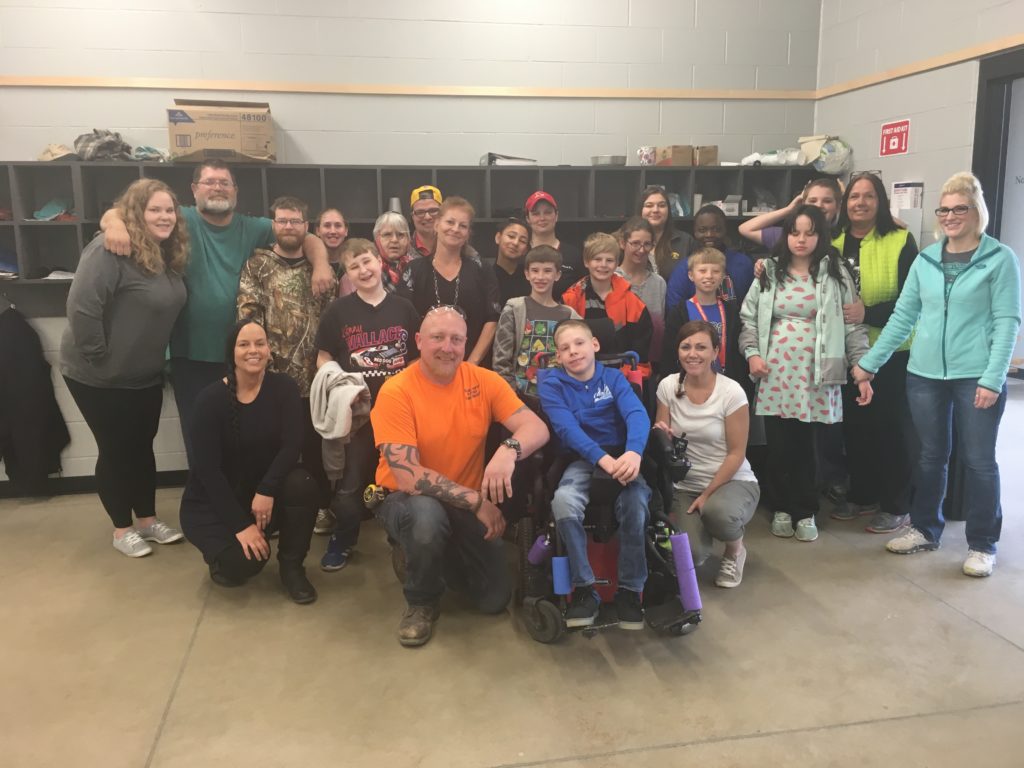
I am a K-12 Instructional coach. The idea for this Starbucks Classroom PBL came out of a conversation with one of our middle school special needs teachers. She had always wanted to try flexible seating with her students but wasn’t sure how it would work for all of the different physical and academic needs in her extremely small classroom. This teacher was going to try out some different options when the idea came about to turn this into a project-based learning (PBL) opportunity for her students.
She had a few students with sensory needs including autism and ADHD and one non-verbal student in a mechanical wheelchair that used a communication device. The student in the wheelchair had never been able to sit in anything other than a standard chair with adaptations or his wheelchair. In his 7 years of schooling (6th grader) he had never had a floor seat option. This factor drove the project.
Context
The Starbucks Classroom PBL: Our classroom needs help! We have some very uncomfortable chairs that need to be redesigned. We also need a more inviting space where students can focus better.
Learning Outcomes:
Research Strategies- pulling information and ideas from researching the best solution (ELA) W.7
Writing opinion piece and a quality interview/ data collection type question to gain information from others (ELA) W.2-5, W.10, RI.1
Collaboration, communication, and problem solving (21st Century Skills)
Safety- using a hammer, staple gun, glue gun……. (Life Skills)
Reading and informational text using text features and close reading (ELA) RI.5, RI.9
Demonstrate and describe processes used in developing, evaluating, and improving on structures that will meet human needs with a margin of safety. (Science)
The Driving Question
All good PBLs have a driving question. The driving question is the focus of the entire project. The driving question for the Starbucks PBL is: How can we make flexible seating accessible for all physical needs?
Tangible Outcomes
Flexible seats for the classroom
Information fliers for each type of flexible seat
Flexible seating survey and interview questions
Rules/procedure posters/cards for each flexible seat station
The Challenge
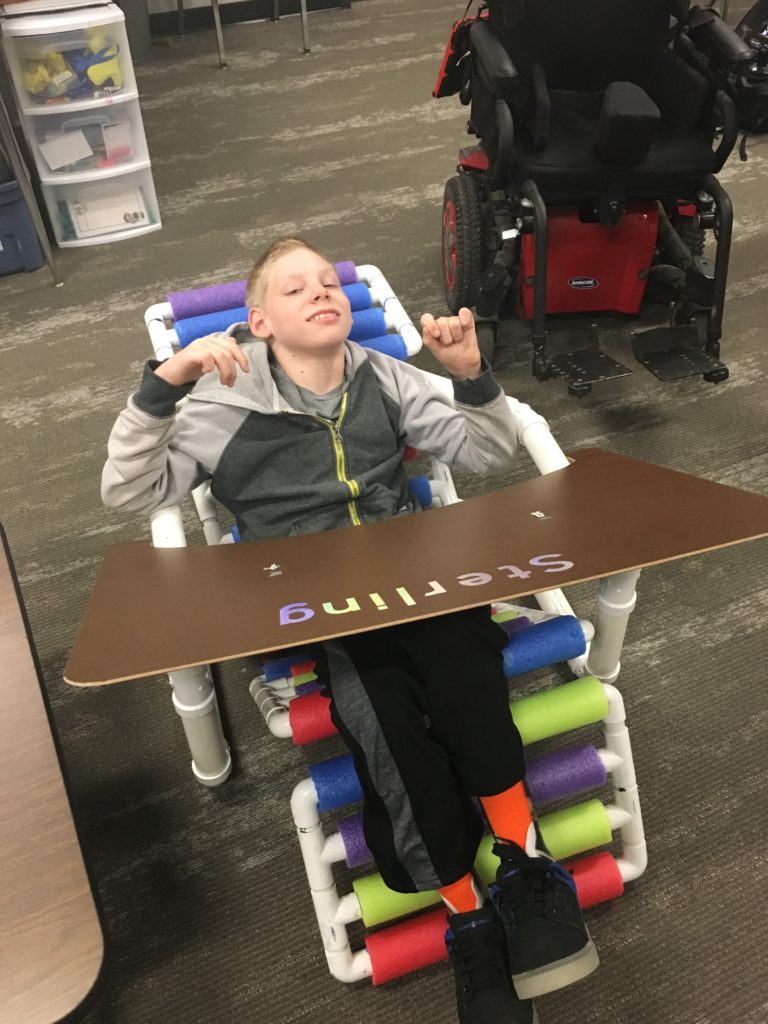
This Starbucks Classroom PBL was set up as a design challenge. We challenged the students to create flexible seating options for all physical and sensory needs, including giving the student in the wheelchair a floor option. Another challenge to this project was the extremely small space we were working with. Students had to keep in mind how the seating options would be stored, look for options that could double as storage, and make sure that there was enough space for the wheelchair and evacuation if needed.
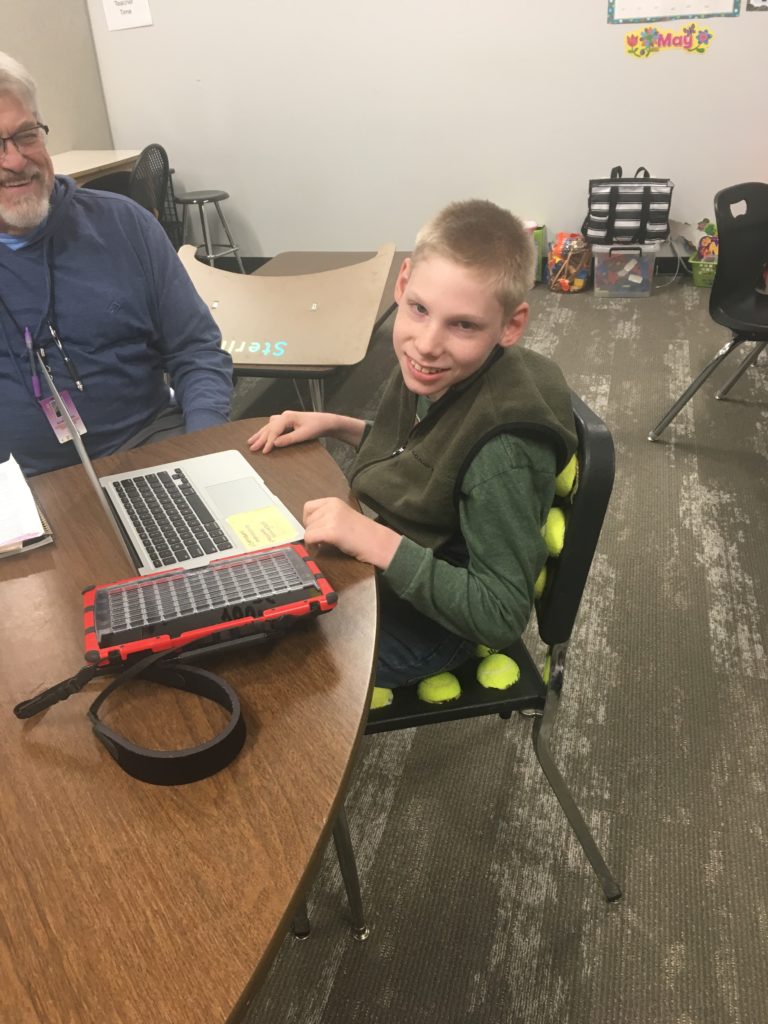
Sterling’s adapted flexible seating floor option
How Does This PBL Work?
Create A Snapshot
First things first, we had to come up with a snapshot of what we wanted the students to do with this project. We decided that for the Starbucks Classroom PBL, we wanted the students to become our classroom furniture designers and conduct research on the benefits and drawbacks of flexible seating. This will help with choosing options that fit best in your classroom.
Create A Vision
As a class, we came up with a vision of what we wanted flexible seating to look like in our classroom. Your vision serves as the driving force of how you will use flexible seating in your classroom. Create a vision statement with your students. The vision we came up with for the Starbucks Classroom PBL was that we wanted to create comfortable flexible seating for all physical and sensory needs.
Classroom Visits
Students were required to collect data from others. They took a field trip to other flexible seating classrooms to try out different options and see how they worked in the physical space. The teachers we contacted were more than happy to invite the students in and participate in interviews. The students had a few classroom visit look fors that they were required to take notes on including the types of flexible seating they saw, how the students chose their seating options, rules of flexible seating, storage of the seating options, and if any option would work for all physical needs.
They visited Kindergarten, 1st grade, 4th grade, middle school, and high school flexible seating classrooms. They also had to try out each option and list the pros and cons of each.
Collect Data
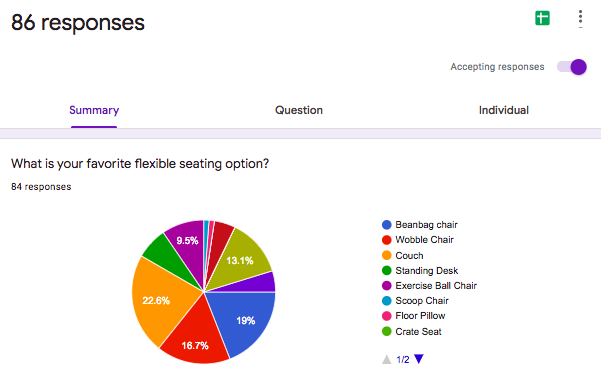
Our students created a digital survey (Google Form) to collect data from the students about their preferences.
The goal of the student survey was to figure out what the most popular option was amongst students as well as the most comfortable options available. They also used a visual survey that they marked when visiting the classrooms to figure out which options teachers were using. Our students then graphed the results to see what the clear winner was.
During this visit, they interviewed students and teachers of that classroom about their feelings on flexible seating to figure out what works and what doesn’t as well as get an idea of how the current seating options in those classrooms have changed from the original plan. I found it helpful to have a student video the interviews and other students to take pictures of the physical environment and seating options. This way the students can use the videos as part of their research or things to keep in mind when making decisions on what options work best in your classroom.
Inquiry & Research
The students had to figure out what flexible seating options would work best for our small classroom and student needs within the classroom. We had our students each choose one form of flexible seating to conduct research on. An option that they would like to see in the classroom. They were looking for the pros and cons of that flexible seating option, the cost, and the benefits to students. The students then had to write a persuasive piece to persuade their class to choose their option. They then presented their argument to the class. The class voted on final seating options after hearing every student’s arguments for their option.
The students were also tasked with the job of figuring out what materials we would need, the cost of materials, ideas on where we could get the money to purchase everything, and who we would need to recruit to help us build the custom seat. They also had to measure and map out the classroom and decide where everything would go. The students had to keep in mind that we had an extremely small classroom so they would need to come up with seating options that double as storage. In addition to the small space, the students had to consider every student’s physical and sensory needs.
Interview A Client
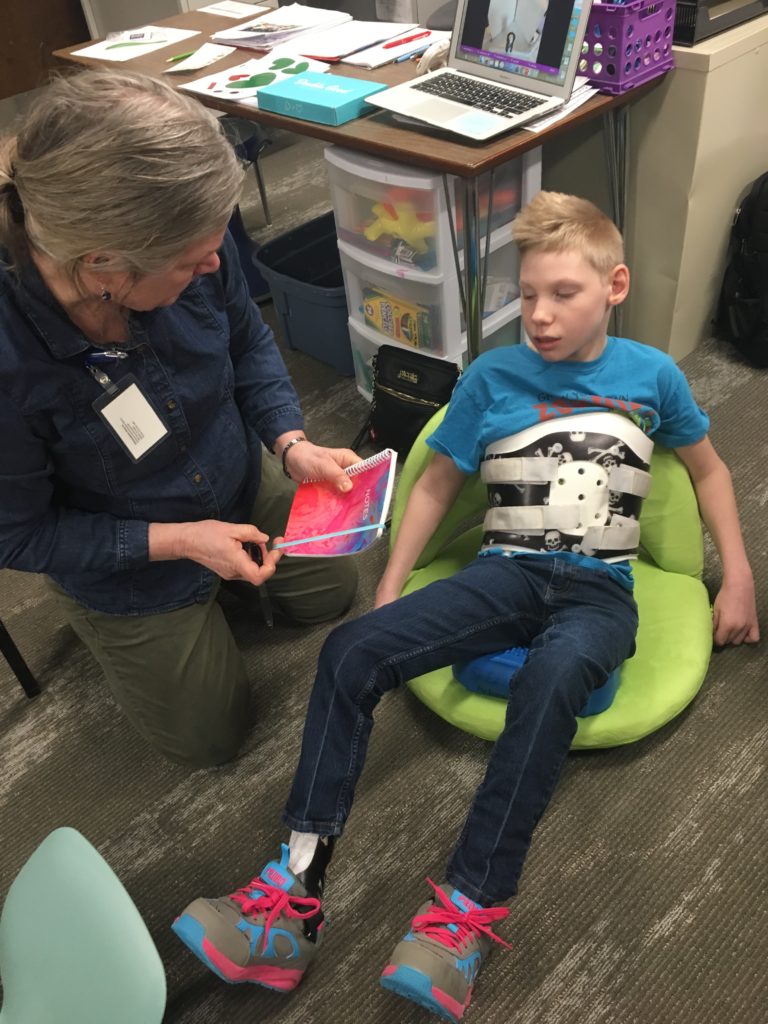
The students interviewed their client (student in the wheelchair) who they were custom making a floor seat to see how they could design something to fit his specific needs. They asked questions about what this student has tried in the past, what was comfortable to him and what he wanted to try. They found out that this student has never had a floor seat option and has only been able to sit in his wheelchair or a standard chair with adaptations. He also has a standing option but only uses the standing chair during his occupational therapy. He really wanted a floor option like his peers.
They also interviewed his occupational therapist for things to think about when looking to create something to fit his needs. She helped the students with specific measurements and gave suggestions about how to fit his needs. All questions were designed and asked by the students. If you are thinking about making a flexible seating classroom without making a custom seating option for a specific need the teacher would make a great client. Questions to the teacher could include color, number of options, preferences, and storage capabilities.
Create A Budget
Before figuring out how we would get the money to fund this project the students had to first figure out specifically which options would work best in our space and how much money we would need. They created a visual budget. The visual budget was used as part of the presentation piece. We presented our needs to local businesses. This included specific items, where they would be ordered from, the quantity, and the total cost. The students decided on designing pool noodle chairs made out of PVC pipe and pool noodles, 5-gallon bucket seats, standing desks, and tennis ball chairs. The pool noodle chairs were easily foldable and slim for storage, the bucket seats fit our low table and doubled as storage and the tennis ball chairs worked well with the different sensory needs.
Design A Sales Pitch
The class as a whole had to come up with a sales pitch that they would use to get investors. They wrote a script, which included the benefits of flexible seating, the motivation behind creating flexible seating, and our financial needs. They used a lot of the same information from their research and persuasive piece. The students also had to figure out what they were going to present and the presentation order. We practiced this multiple times so that it was perfected for the actual presentations. The script was then presented to local businesses to see if they would be willing to donate toward our project. We (the teachers) called and prepped the businesses ahead of time so that they were prepared to hear their pitch. They were all more than happy to participate.
Strategically Choose Potential “Investors”
I really like to tie the type of businesses we ask with the type of project we are needing support with. I have found that the better the connection is to the project, the more likely they will be willing to help. In the Starbucks Classroom PBL, we were needing some construction-type materials like PVC pipe, PVC glue, and pieces of wood, so we asked the local lumber store, hardware store, and plumbers.
We also worked with our local adults with special needs program to help us create our seating options. They also chose to donate to our project. A huge selling point for businesses to donate to our project was that we would advertise their donation to our project in any social media and news articles when we shared our final project with the world. Don’t forget to have the students create special thank you notes for the donors. All of our donors hung their thank-yous in their stores.
Don’t Be Afraid To Ask
It doesn’t hurt to ask a business or group to donate to your project. The worst that can happen is that they will say no thank you. We have asked for money, time, help with physically creating our project and materials. I have done a lot of PBLs where funding was needed and have asked many businesses and individuals to donate.
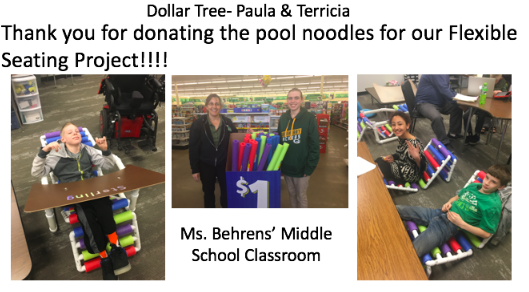
I have never been turned down but would understand if they did. The employees of our local Dollar Tree donated the pool noodles. They paid for it out of their own pockets because their company doesn’t donate. Since this was implemented with a special needs class and we wanted our adults with special needs program to help create the seats we also asked them for donations. We easily got the funding. I have found that all of our local businesses are more than willing to help and jump at opportunities to work with the school. The more you can stay local the better!!!
Adult-World Connections
Meet with construction experts both in house and within the community with help constructing the actual seats
Interview teachers of flexible seating classrooms
Pitch our needs to local businesses
Work with the occupational therapist.
Work with the Industrial Tech teacher and students
Invite the adults with special needs program in town to help create seating options
This turned out really amazing!!! I would suggest that if you choose to create a Starbucks Classroom with your class that you consider inviting your local adults with special needs program in to help you or your special needs students, even if you are in a gen. ed. classroom. It’s super rewarding for the students and the clients alike.
Our local adults with special needs program is always looking for activities that their clients can help within the community. It’s seriously a win-win! Just make sure that you follow your school policy on visitors. All of the clients that wanted to help had to go through our background check process as any other visitor would. We also had the adults with special needs program choose the clients that were interested in helping and would work best with this project.
Many of the students in the special needs class have relatives as clients at the special needs adult program in town and will most likely use their services after graduation. Another aspect of working with the adults with special needs program was that we were building those relationships early on so that if and when they joined that program they would already know others, have relationships built, and would have a smoother transition. They would also be more likely to take advantage of their services in the future.
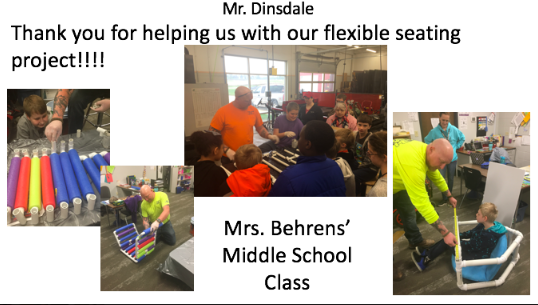
Our Industrial Technology teacher was more than happy to help us with the construction of the custom seats. He had his class help our students with measuring, cutting, and putting our seats together. The class helped with everything including creating the custom seating option. This gave his class a great project to work with another class on. The high school students were patient, asked great questions, were excited to help their underclassmen and really stepped up to show leadership skills. This was a true collaboration between two classes and an amazingly rewarding experience for all students.
In the Starbucks Classroom PBL, the students were in charge of everything, with our guidance and direction. This project was focused on ELA, Math, and 21st Century Skills. We taught mini-lessons on safe online research, question writing, research strategies, text features, data analysis, money, measurement, area and perimeter, and how to ask and answer questions. The students worked on problem-solving roadblocks as they arose, goal setting, meeting a timeline, sticking to it, and communication. They also learned about prototyping and adjusting their design along the way.
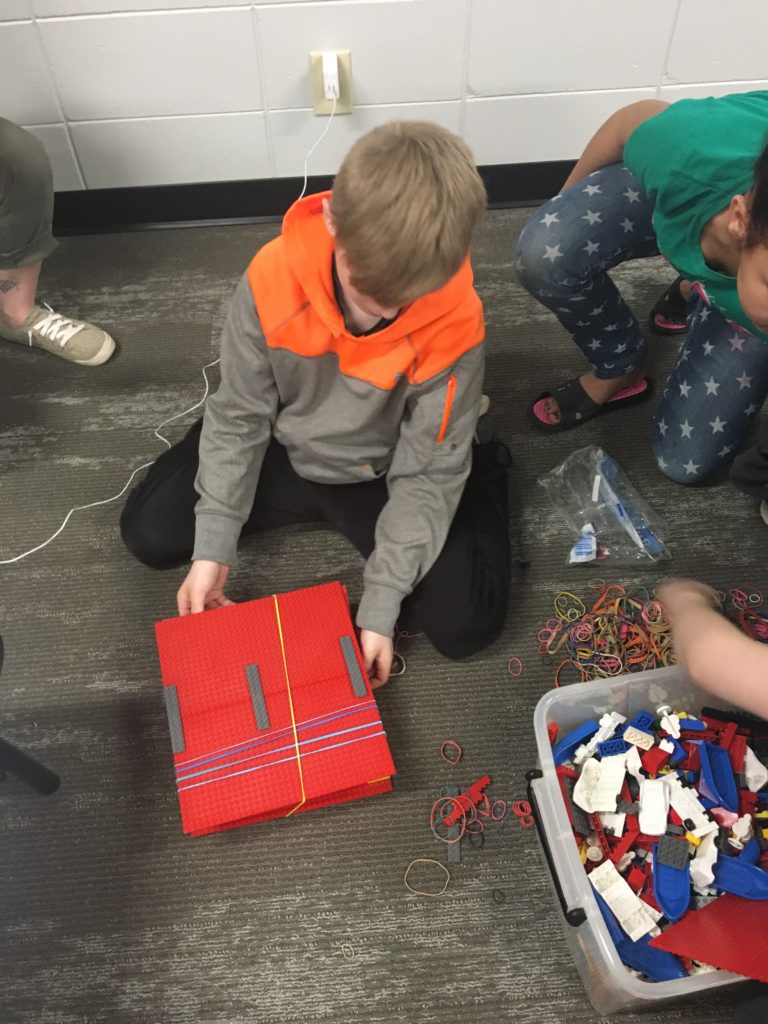
Drafting & Mini Model
Now comes the fun part. Each student first started with creating a drawing of what their custom floor seat would look like. They then used craft materials along with Legos to build a mini model of their custom seat. We put out every craft material we could find. The students were then challenged to create a prototype. The mini model was really helpful when it came to building a prototype. We worked with the industrial tech class to create the prototypes.
Prototyping & Building
A prototype is the first full-sized model of what the actual seats will look like. A sample that serves as the test model. A prototype is very important. Prototypes allow designers to work out the problems and problem solve by making the necessary tweaks for it to function. We started by working with the industrial tech class to create a prototype of the pool noodle seat that would be used by most students. Once we figured this out we were better able to customize the custom floor seat pool noodle option. We found the directions for the pool noodle seat from this We Are Teachers article.
After the prototype was complete we built 4 more pool noodle seats. We invited the adults with special needs program to help build the rest of the pool noodle seats with our students and the industrial technology students. After opening the PVC glue, we found that it is very toxic to breathe so we made sure to work in a very large ventilated area for the safety of everyone helping. We also had everyone wear safety glasses and rubber gloves for safety.
Custom Seat
The custom floor seat was inspired by a Bumbo. The Bumbo is a seat created for infants that can’t sit up on their own without support. They are made of foam and have a piece that fits between the legs and keeps the child upright much like the piece on the client’s wheelchair. It also braces the child to help hold up their core. Our student client can not physically hold himself up without support, so we knew he needed similar support to his wheelchair.
One job of a custom furniture designer is to keep their client’s wants and needs in mind. This particular client is a middle school student with particular physical needs. The student designers needed to keep that in mind when designing a custom option for him. Part of the design goal was not to make our client feel like a baby. Instead, the designers wanted to create something that would be fit for a middle schooler. Something that was similar to what his peers were going to use.
Custom Design
To create the custom floor seat design, students first created the outside support that would help hold the client upright. They customized it by making the bottom one PVC pipe higher than the other pool noodle chairs. They also tweaked the back of the pool noodle chair to fit the outside support brace. The students found the best way to tweak a prototype is to make the tweaks as the student is in it. This made it easier to see what issues needed to be resolved. The students realized that the client needed some type of desk that would attach to the outer brace. This would hold his communication device and computer.
After we created the desk we realized that we needed to make it adjustable. It needed to be able to raise up and down and move closer and farther away if needed. We also realized that his devices would slide so we added a hook for his communication device strap and a stopper for his computer. Our student client was super excited with his finished custom seat and uses it in most of his classrooms. This custom seat should fit him throughout high school.
5-Gallon Bucket Seats
In addition to the pool noodle seats, we also created 5-gallon bucket seats. These fit our low table and doubled as storage. We had the buckets donated by a construction company. These were super easy to create. We had the students spray paint the buckets using donated spray paint. We were initially going to create the seat tops but found that purchasing ice fishing bucket seat pads were actually cheaper so we chose this option instead. They even rotate! We worked with the high school special needs class to use a Cricut machine to print out name stickers for each bucket.
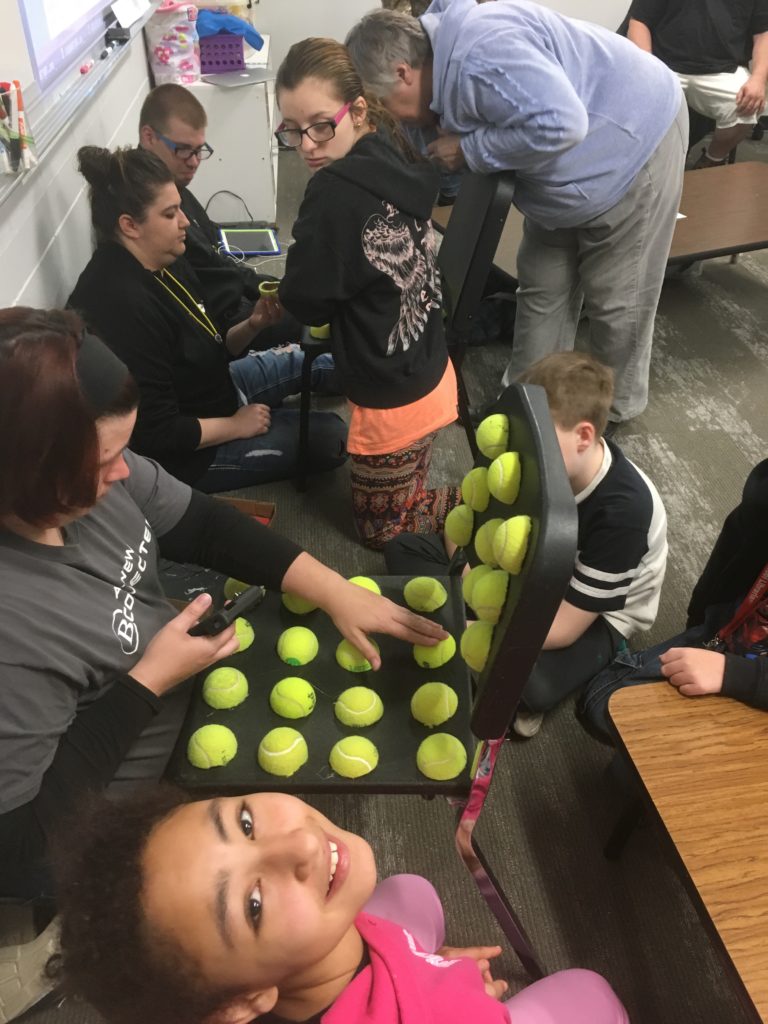
Tennis Ball Chairs
The students conducted all of their own research. During this process, one student found an amazing tennis ball chair idea. Tennis ball chairs are not only super simple to create but work well with all sensory needs including students with ADHD and Autism. To create a tennis ball chair all you need to do is cut a few tennis balls in half and glue them to any chair. These were super easy to create and the materials were easy to get. The high school tennis coach donated all of the tennis balls we needed. All we needed to do was ask.
It turns out that every season the older tennis balls that don’t have much bounce left in them are swapped out for new balls. The coach was more than happy to donate the phased-out tennis balls to our project. Since the tennis balls donated by the tennis program were used and a little dirty, the students had to figure out how to wash them before they could be used to create the chairs. They decided to YouTube how to wash tennis balls. It turns out all you need to brighten tennis balls is a little dish soap and warm water.
Do The Math
Math was a huge part of the Starbucks Classroom PBL. The tennis ball chairs were made of tennis ball halves. This forced the students to create a plan for the number of tennis balls needed. The students had to use multiplication and fractions to figure out the specific amount needed for each chair and the total needed for 4 tennis ball chairs. Since we were working with students with special needs, we had to help our students cut the tennis balls in half for safety purposes.
The tennis balls donated by the tennis program were previously used by the tennis team. We were really thankful for the donation. It really helped us save on our budget, which allowed money to be spent elsewhere in the project. Although we were excited about the donation, they were a bit dirty. The furniture designers had to figure out how to clean them in order to use them for their chairs.
Once the tennis balls were cleaned and cut the students had to figure out the pattern that would work best for sensory input. They set out a few different patterns before finding one that was comfortable and would work for every students’ needs. The next step was to glue them to the chairs. They tried out 3 different kinds of glue. First, they started with hot glue and found that the student with Autism was easily able to pick them off. Then, they then tried clear caulking but this made a huge mess and didn’t stick to the plastic chairs very well. The winner was Gorilla glue.
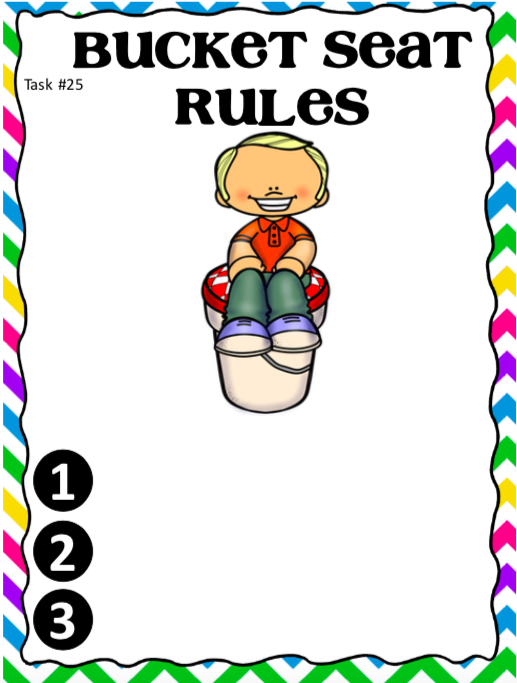
Create Flexible Seating Rules
After the creation process was finished, the students decided that they needed to create usage rules that students are required to abide by when using each chair. This came about after a student stood on one of the bucket seats. The students also realized that in order to keep the chairs clean and damage-free for long-term usage that they needed to work together as a class to create specific rules. Thes students decided to hang the signs above each flexible seating option to remind students how to safely use each choice. This was a great way to end this project!!!! As a teacher, it’s AWESOME to see students think like a teacher and show pride in their work.
Need more project-based learning ideas? Check out my other PBLs here!
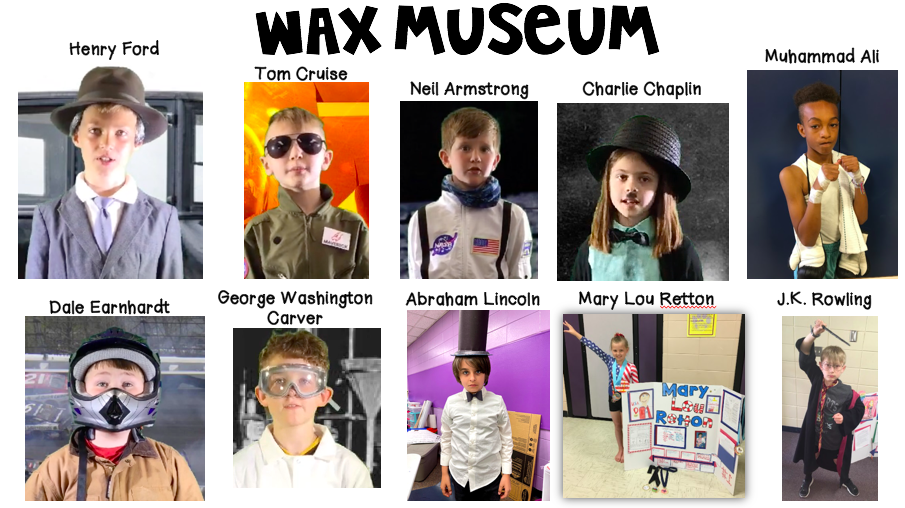
Context: This project is a cross-curricular project that was created to get students excited about reading biographies and writing informational text. This project has students reading, researching, writing informational texts, and presenting their research to an audience.
Informational text is important to read in all grade levels. The common core standards are divided almost equally between literary and informative text. Both types of text are equally important. When it comes to informational text, I have a few favorite projects I always do. I love combining informational text with writing, researching, speaking, and listening. Writing informational pieces is a big standard in every grade, along with researching a topic and reporting on it. Wax museum is the perfect project to not only get the biggest bang for your buck by including multiple cross-curricular standards, but it’s a HUGE hit with the students.
One way I love to include all these aspects in one thing is the Wax Museum Project. You can really do this at any grade level.
The Wax Museum Project is where students research a famous person of their choosing. This could be a historical figure or anyone from any timeframe that has made an impact on our world. The students read about the person using print and digital resources, research the person’s life, take notes while they are reading, use an organizer to plan their writing, write an informative essay, and present a speech to the class, parents, community, and via social media to expand their audience. Students dress up as their person, memorize their speech, and present their learning to their class, parents, the community, and the world. Student speeches are recorded and posted on social media (with parent permission of course) to expand their audience.
Voice & Choice: Students choose the person they research. They create their own display boards, plan their own scripts, and plan their costumes.
Real-World Connections: Students present their learning to an authentic audience. Students simulate their person by dressing up like them as they give their final speech.
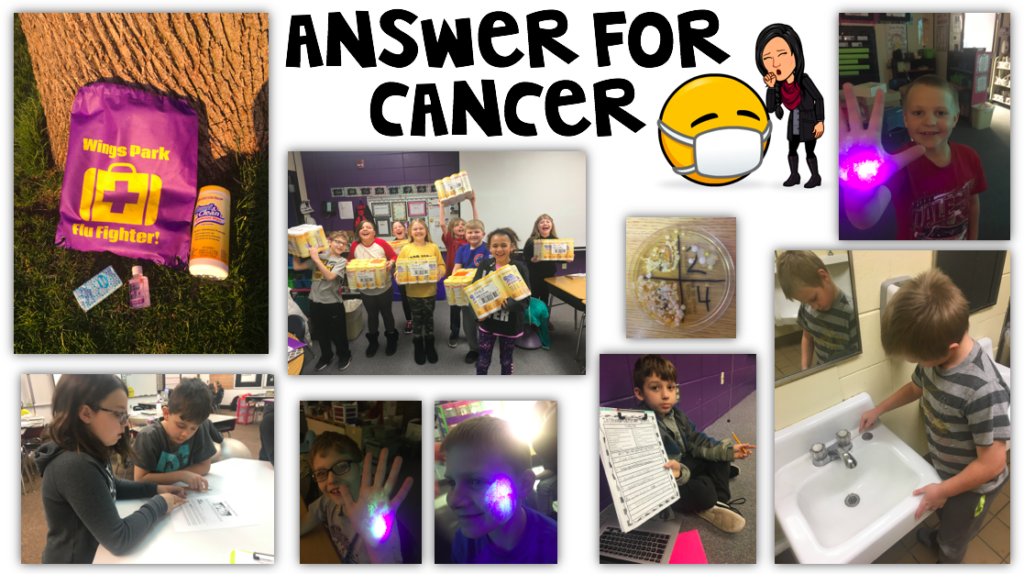
Context: Students will create a Public Service Announcement to inform their audience on ways to stay healthy.
Inspiration: Answer For Cancer is a project that was inspired by the 3rd-grade teacher who has been fighting cancer for the past few years. The goal of the Answer For Cancer PBL is to teach 3rd-grade students how healthy choices can help prevent us from getting sick with things like the cold and flu as well as how we can minimize our risk for getting cancer.
Voice & Choice: Students will choose their research group and create their own research questions based on the compelling question.
Real-World Connections: Students will interview the school nurse, someone fighting cancer, and a real cancer researcher. Students will work with the Food Corp teacher and PE teacher to learn healthy habits. They will present their germ scavenger hunt data and plan to the school janitor and principal.
Cold & Flu: This project focuses on teaching students the process of researching, reading informational text, informational writing and really gives them a purpose for learning. Students will learn about germs, how they spread and how we can stop the spread to keep ourselves healthy during cold and flu season. The opening event called Bug In The Classroom will teach students how easily and quickly germs spread by using glow powder and a backlight flashlight. Students will also collect data through engaging in a germ scavenger hunt around the school looking for germ hot spots using cotton swabs and Petrie dishes to grow live cultures that they will investigate with microscopes. Students will present their germ findings to the janitors, principal, and school nurse to help reduce the risk of others contracting a virus by making sure the hot spots get regularly disinfected. Students will be given a topic like Flu prevention, work with their group to come up with their own research question, conduct research based on their question, work through the writing process to create an informational piece, and create a 30 second or less Public Service Announcement to present their findings to others. They will also create flu fighter bags that will be sent homes with all of the students in the building. They will create an informational flyer to teach others how to stay safe during cold and flu season.
To finish the cold and flu unit, students will create cold and flu kits to pass out to all students in the building, students in the district, and the community. These kits could include items such as hand sanitizer, masks, disinfecting wipes, kleenex, disposable gloves, and the informational flyer they create. Students will create a plan they will use to ask businesses in town for donations to build their kits.
Cancer:
This project will then move into learning about what cells are and why we need to do everything in our power to keep our cells healthy along with how cancer affects our healthy cells. This project connects really well with the structures of life FOSS science kit. The students will work through a STEM activity called Curing Cancer. They will act as biomedical researchers and will design their own tool to help extract cancer cells (lima beans) from healthy cells (lentils). They will run trials and have the opportunity to tweak or redesign their tools. If students successfully remove all of the cancer cells without too many healthy cells they beat cancer. If not, they double their cancer cells and start another trial.
They will then be split into five different cancer research groups including Cancer & Prevention, Causes & Treatments, Support, and Healthy Living. The students will work through researching their questions about their topic using multiple sources, write an informational piece and create an informational video to teach others about their topic. As a culminating project, the students will create kid chemo kits which will include handmade pillows (with Growth Mindset quotes and student pictures), squishies, fidget toys, and whatever else the students come up with to send to the children’s cancer unit at the University Of Iowa Children’s Hospital.
Standards
Health Literacy: 21.3–5.HL.1, 21.3–5.HL.3, 21.3–5.HL.5
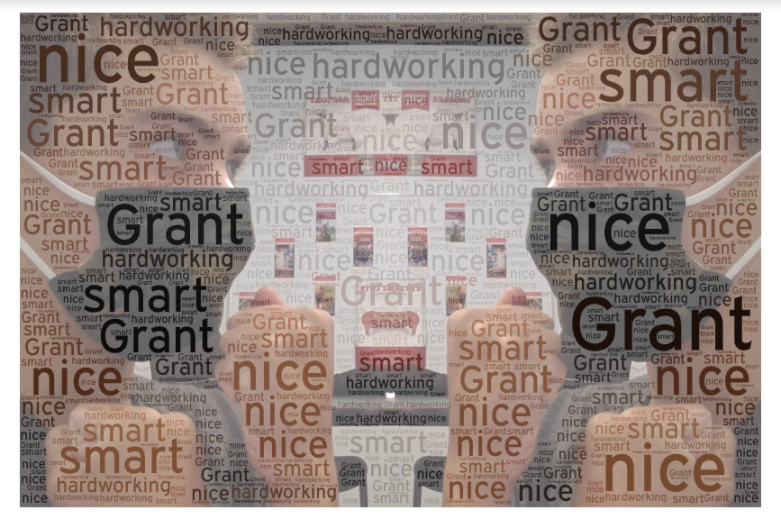
Context: This was based on the book Best Self, Be You Only Better by life coach Mike Bayer. It is a social skills, self-awareness, and leadership PBL for middle schoolers. Students learn about the different masks we wear throughout our lives. The students start out by learning about their Best Self Superheroes. They design a drawing of what their best self character looks like, name it and give it a tagline. They then learn about their Anti-Self Villain. They do the same thing with that character. Students research how different cultures use masks. They also describe their inner thoughts and use self-talk to control their actions. They create a personal action plan complete with small wins and timelines based on one of the anti-self traits they would like to change. They then design a plastic mask describing their best self traits on the outside and their anti-self traits on the inside. Students then use their action plans to create vision boards to remind them of their goals.
This project then moves into learning about leadership qualities. Students choose a leader from the past or present and research their leadership qualities. What makes them good or bad leaders? How did their decisions improve or hurt our world? Students will write an informational piece about the leader of their choice that they will then present to their classmates. The class will come up with a plan to improve the climate and culture in our middle school. Their plan will be to create a school leadership group that would collect ideas from students that they would present to the principal to make a change.
Voice & Choice: Students designed their own characters, masks and chose the leader they researched. They also came up with their own action plan to improve school climate and culture.
Real-World Connections: Students interviewed a real-life coach and worked with the guidance department on coping skills, social skills, and social awareness. Students present their leadership plan to the school administration.
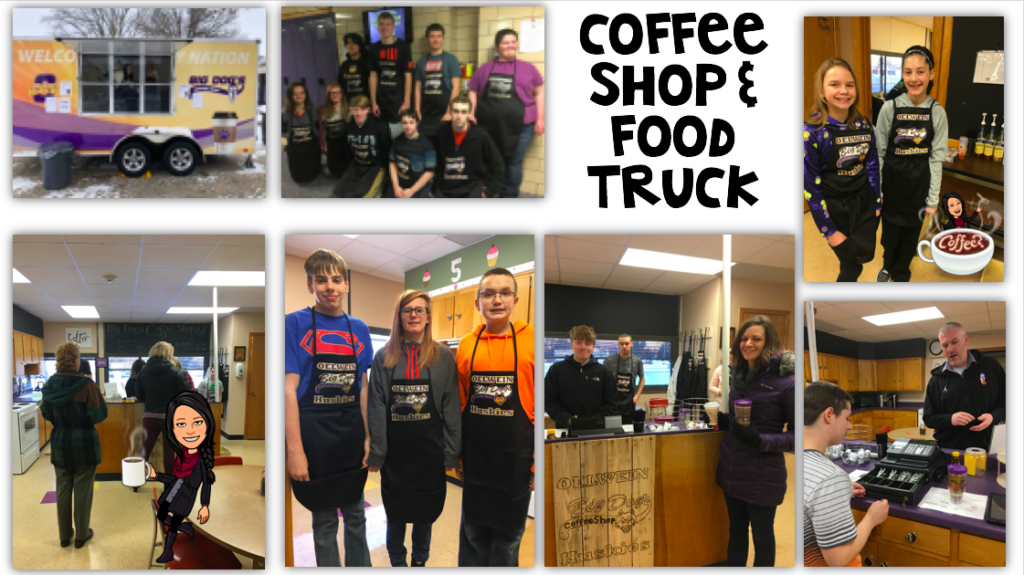
Context: The high school Life Skills special needs classroom runs a real-life student-run coffee shop that serves all staff in the district and high school students.
Inspiration: The high school special needs teacher was looking for a way to teach her students life skills they can use when they leave high school. She also wanted to bring the students out in the community to learn skills such as grocery shopping, ordering at a restaurant….
Voice & Choice: Students chose the products that are sold in the coffee shop, price items, and choose items to sell seasonally.
Real-World Connections: This is a real coffee shop that the students run. They prepare to open, greet customers, handle real money, track inventory, budget, track the balance, and clock in and out. Their payment is an education. This is a big part of their curriculum. The students also came up with the name, created the décor, and came up with a plan to advertise the products. They even ran a blind taste test to collect data on the products to include on the menu. We brought the students to a local bank, which donated the initial amount that we used to purchase the fundraiser mugs. They worked through a mock small business plan including pitching their idea to loan officers and signed mock loan papers.
The students had to work with the high school principal to come up with a solution that would allow students to bring their drinks into the classroom. According to the student handbook, students are only allowed to bring clear mugs into the classroom. Our students came up with the idea to create a Mug Club. Students could purchase a customized Big Dog’s Coffee Shop clear mug that would be allowed in the classroom. All students who purchase a mug are required to sign a contract stating they will only have coffee shop products or water in their mugs. The students had to follow the Healthy Kids Act state guidelines when planning the products they sell because their main customers are students.
All mugs are marked with student names and are kept in the coffee shop for daily cleaning. Students return mugs to the coffee shop by the end of the day. Coffee shop students clean and organize them. This also acts as a fundraiser that helped us open the coffee shop.
The coffee shop was so successful after the first year that we decided to expand the idea into adding a real running food truck. This took 2 years from beginning planning to opening. Like the coffee shop, they are in charge of everything from grocery shopping with a budget to food prep, recipes, and service. The students conducted a soft opening to test their menu items to staff only with the truck parked across the street from the high school. Now, the food truck caters to business meetings around town and is parked at participating businesses during their lunch breaks. The students track their earnings using a mock bank app called Bankaroo. This tracks the real budget but doesn’t have anything to do with the real bank account.
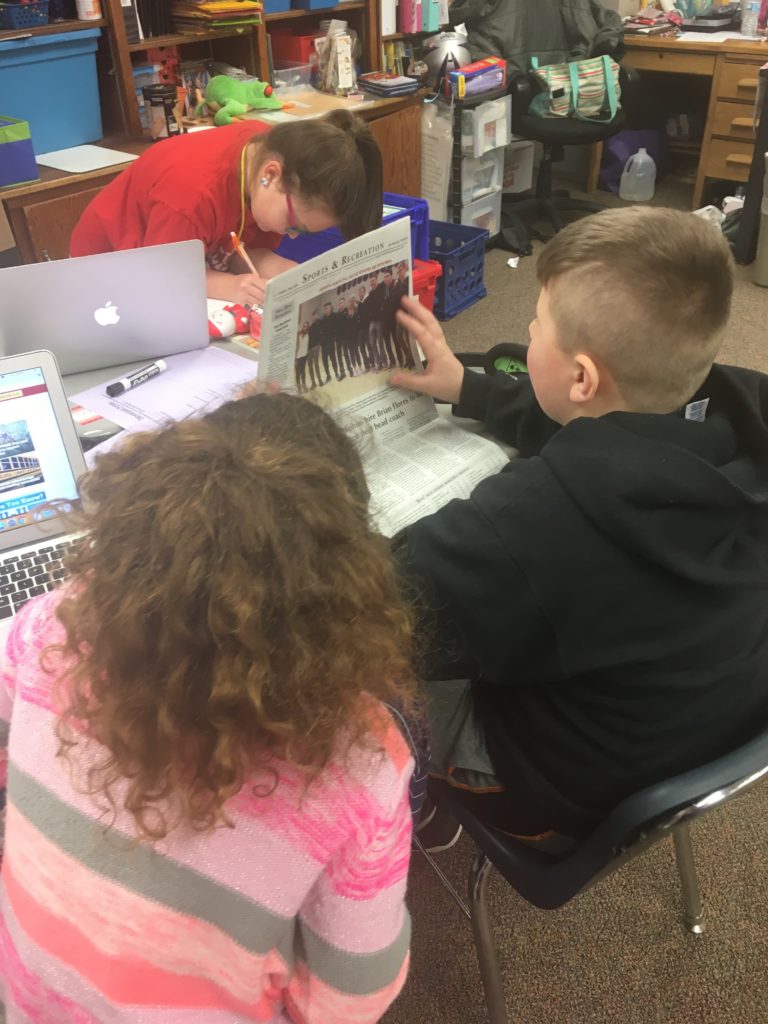
Have you been looking for a fun and engaging way to teach multiple standards? Are you looking for a project-based learning idea that incorporates reading, writing, social studies, science, and math along with multiple 21st Century Skills? The student-run news broadcast is an innovative project that encompasses all of the above with a focus on informational reading, informative writing, and research while incorporating 21st Century Skills. The concept of the news broadcast was born out of the need to give students a purpose for learning while giving them an authentic audience. The staff, students, and community LOVED seeing the completed projects, and the students LOVED checking the number of views on their videos that were posted on our district social media accounts. Talk about motivation!!!!!
News Broadcast Segments
The news broadcast consists of five segments:
Histories Mysteries: Connecting an event from the past to a current event. (Social Studies)
Math Is Everywhere: A math broadcast including real-world examples of how the math is used in the real world.
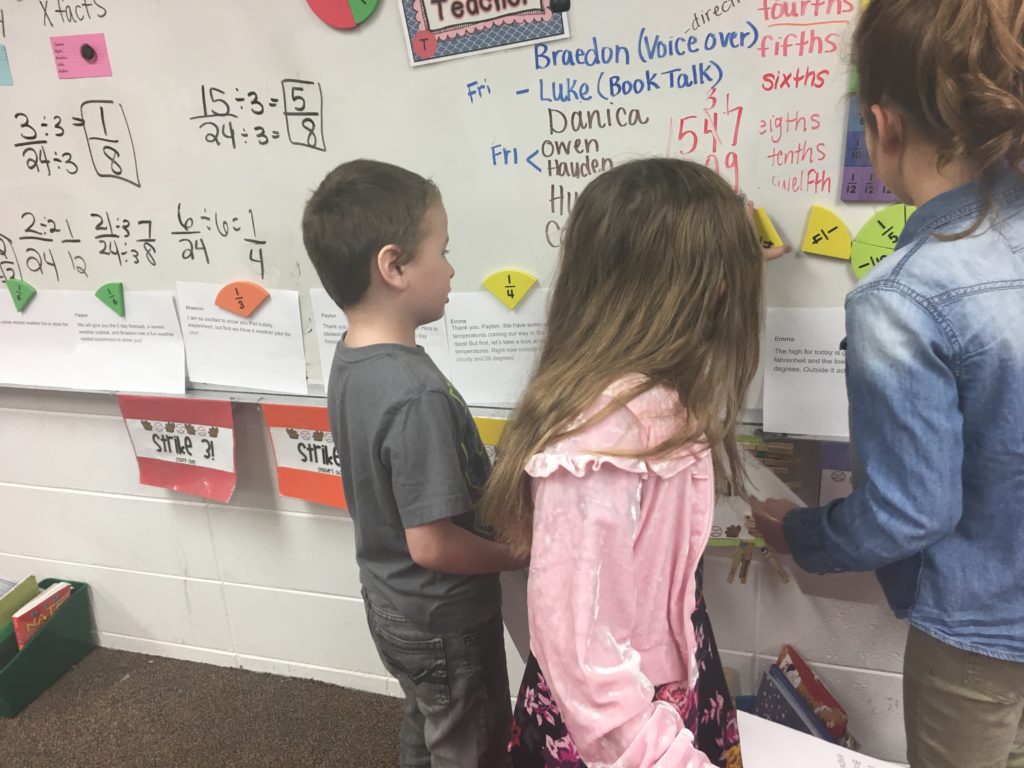
Weather In Our World: A weather broadcast including a 5-7 day forecast along with weather-related experiments.
Sports Broadcast: A segment on upcoming school sports along with highlighting our school athletes.
Debate Broadcast: Debate format that includes a Would You Rather section, persuasive topics, current events and book talks Reading Rainbow style.
https://www.youtube.com/watch?v=ZUgTZ12O7q4
I created the student-run news broadcast PBL unit to use with a 3rd-grade classroom, but it can be used for any grade level 2-8.
News Broadcast Timeline
This project was designed to run for 6-8 weeks and was used with a 3rd-grade classroom, but could is easily adaptable. We completed 3 complete news broadcasts the second semester or from the end of January-May.
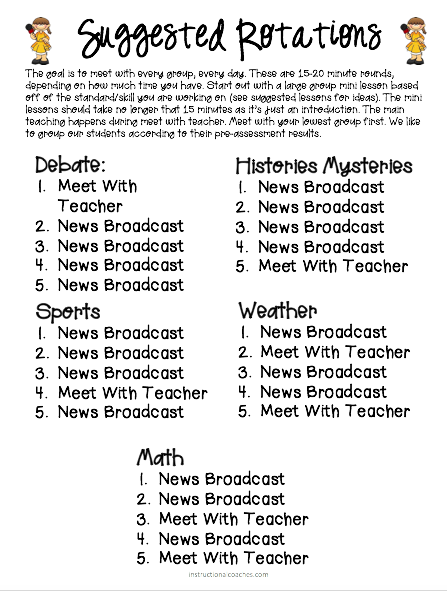
Students collaborate quite a bit within this project and have a lot of independent work time. The teacher takes on more of a facilitator role with this project with multiple direct teaching mini-lessons and a meet with teacher rotation using the form of a writers workshop model. This student-run news broadcast works best when it’s run similar to a literature circle. Each group has a different focus and each student has a different job within their group.
News Broadcast Student Jobs
Each group meets with the teacher daily. This could be for a mini-lesson, progress check-in, writers workshop, direction, and support. We found that with implementing this project in 3rd grade we had to do quite a bit of direct teaching with our expectations of working with a team and expectations for working independently to meet a deadline. The students used a project calendar where they crossed off each day as we completed them. The meet with teacher check-in really helped with students who were having difficulties completing their job independently. We did a lot of goal setting and direct support for those who were behind. In addition to the student timeline, students were also required to turn in an exit ticket at the end of class of what they completed, next steps, and goals. This helped keep them on track to meet the required deadlines.
The first step of creating the student-run news broadcast is a group brainstorm session to come up with research questions based on their topic. The topic can be given to each group or you can allow students to choose their own. I have done both. I would suggest giving each group a topic to focus on that connects with something that students are learning in other areas of class such as science, social studies, or math. Each group member then chooses their favorite research question that they will use as a focus for their report and places it in the group research graphic organizer. This will ensure that the segment that each group produces is cohesive. Depending on how many paragraphs you require, students then come up with additional questions based on their research question. These will become subtopic paragraphs.
Student-Run News Broadcast Step 2: Research
The second step in creating a student-run news broadcast is to conduct research. There are multiple opportunities to pre-plan mini-lessons within this step including note-taking strategies, citing sources, and how to conduct reliable research. Lessons that are appropriate for even the youngest students. I created a note-taking tool called Jot Notes that the students used on their research journey.
With our 3rd grade students, we required students to use at least two sources within their research. This could include the internet, books, magazines, newspapers, or experts. It is important that students only report facts that are found throughout their research. Students who are working in the debate group need to back up their opinion using facts. Prior to starting the news broadcast, we taught a lesson called Real or Hoax to teach students how to identify reliable sources and how to spot fake news. All lessons that students were able to use throughout their research.
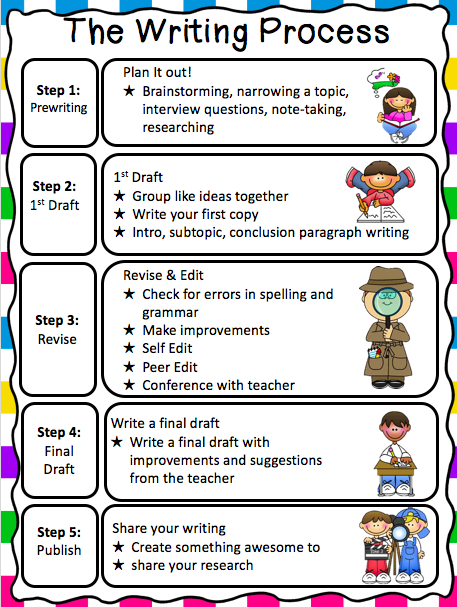
The third step in creating a news broadcast is to take the information collected during the research and write an informational piece following the writing process. With our 3rd graders, we taught mini-lessons on sentence writing, paragraph writing, strong introductory paragraphs that hook the audience, and closing paragraphs. In addition, we took the majority of errors we were seeing in students’ work and planned additional just-in-time mini-lessons. Students work through the writing process of pre-writing, drafting, revising, editing and publishing. It is important to meet with students individually during each step of the writing process. We used a writers workshop model. I have the students type or voice type (as an accommodation) their final drafts. This way students can use the spell-check tool, and all reports can be easily shared with the teacher. Digital final copies also help in the next step of creating a digital script.
Writing Resources
We used the researched-based Self-Regulated Strategy Development or SRSD framework to teach the writing process. For more information on SRSD click here. We also used videos from Brainpop and Brainpop Jr. for some of our writing and grammar mini-lessons. These are great visuals and super entertaining for our 3rd graders. These both require subscriptions. An amazing free resource we use is Quill.org. This site offers many great tools for teaching writing/grammar skills.
Student-Run News Broadcast Step 4: Create A Script
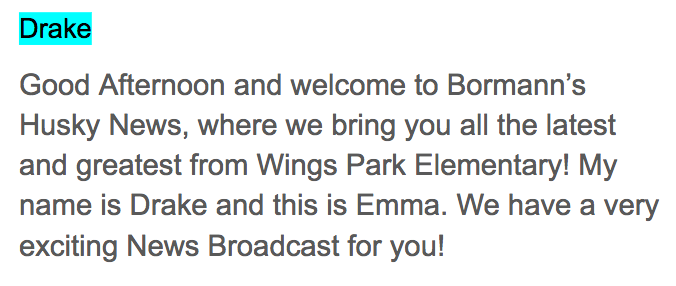
The fourth step in creating a student-run news broadcast is to turn the writing into a script. First, I have students fill out a storyboard where they plug in their background pictures with their words. This helps students ensure that their pictures match their words. I have my students create their scripts using Google Slides. It’s as easy as copying and pasting the final draft into Google Slides. Students may need to split their writing into multiple slides where they can change the size of their words for optimal projection during filming. Digitizing the scripts also makes them easier to share with the teacher. As the teacher, I like to add comments and suggestions on student scripts as needed for improvements.
Sample Google Slides script.
I require students to add their names to the top of each slide they will be reading. Then, when they record each slide I highlight their name to show that it has been completed. I have found that the digital script works much better than creating cue cards on paper. Paper cue cards will work if you don’t have a digital option but can get pretty noisy and can often be heard during filming. I use completed student scripts in plugging all videos together to create each segment using iMovie as well as at the end of filming to create a completed news broadcast. Please see the sample student script below.
Student-Run News Broadcast Step 5: Film
Prior To Filming
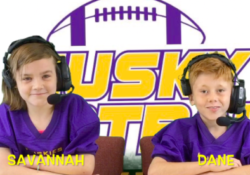
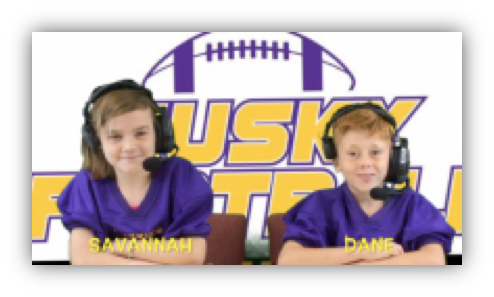
Students will need to plan costumes and props needed prior to filming. Since we were mimicking a real-life news broadcast, we used suitcoats that were found at our local thrift store. We also used football jerseys borrowed from our youth football league along with football headsets borrowed from our high school football team. When students are nervous and are trying to read in front of a camera they tend to mumble or speak quietly. To problem-solve this, we used a microphone, which helped with the sound quality.
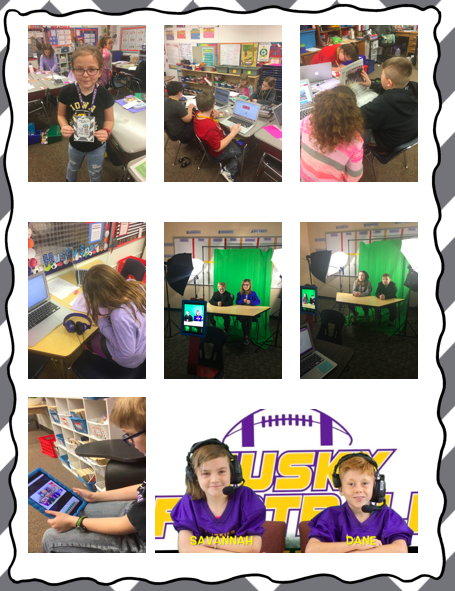
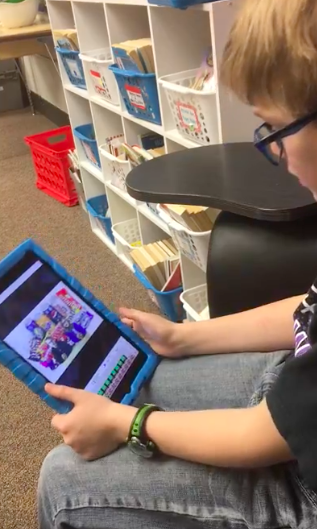
The fifth step in creating a student-run news broadcast is to film their scripts. You could use one iPad that students share if that is all you have available. I recommend using multiple iPads if you have them available to you as this will speed up the editing process. To film, use the video camera option on the iPad then upload videos into the middle timeline of the Green Screen app. Click here for a tutorial on how to use the Green Screen by Do Ink app.
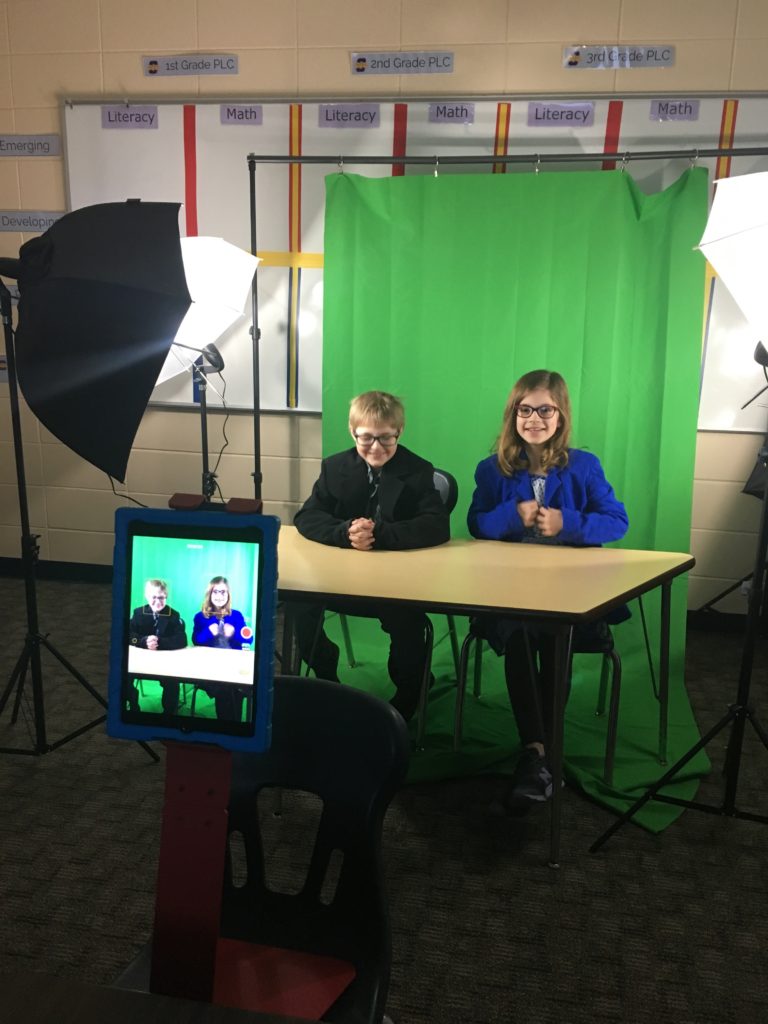
Students filmed their news segment in front of a green screen.
Filming Materials Used
I use the Green Screen by Do Ink app on the iPad for filming. We film in front of a professional green screen (this works best) kit-$100. In the past, I have also used a painted wall (Chroma Key Green)-$39/quart and a Kelly Green cloth-$28. The professional green screen kit is fairly inexpensive and comes with all of the lighting you will need. I have found that lighting is the key to a successful green screen video and the most difficult part to figure out. I highly recommend using a lighting kit when filming.
To film, I started out with an iPad on a stand, which worked well but was a little tricky. I recently wrote and received a grant that I used to purchase an iPad teleprompter kit called a Padcaster. The Padcaster is a teleprompter that uses an iPad to film and a cell phone to project the script. It’s also super easy to use and on wheels, which makes it mobile and adjustable. The Padcaster is similar to the teleprompters that are used at news stations!
Filming Tip:
When filming you will need to make sure that students aren’t wearing green or they will blend into the background and become a floating head.
Practice Reading Scripts
The first step in filming is to have students practice reading and re-reading their scripts for fluency, focusing on rate and expression. This gives students the confidence they will need during filming. If students are filming as a group this is where they would need to organize and plan the speaking order and process.
Students practice their scripts before filming.
Step 6: Add Video Backgrounds
The sixth step in creating a student-run news broadcast is to add backgrounds into the videos in the Green Screen by Do Ink app. Save the photos on the iPad then upload them into the bottom timeline within the Green Screen app. This will place the picture in the background behind the video. Once pictures are in the background, students may need to click back on the video in the middle timeline. Clicking back on the video will allow students to adjust their videos to fit their backgrounds. Make sure to have students match their background photos with their messages from their videos. Don’t forget to have students save their completed videos. The easy-to-use Green Screen app allows students to upload multiple background photos within each video (see green screen tutorial video above).
A student added backgrounds into his Do Ink broadcast.
Step 7: Combine videos
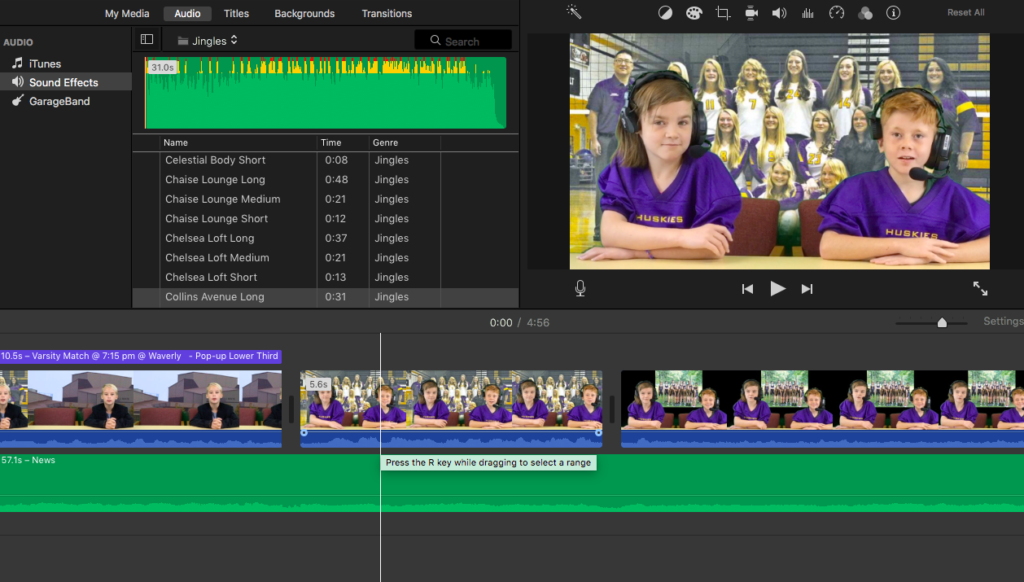
The seventh step in creating a student-run news broadcast is to clip all completed student videos into one news segment/broadcast. Once videos are saved on the iPad the easiest way to share them is to AirDrop them to one computer. I use the iMovie program to edit and clip all videos together. This is where I go to create the final news broadcast.
iMovie is available on the iPad or computer, but I prefer working with iMovie on a computer. It’s much easier using a computer to add in background sound, edit videos, and pictures, add in sound, adjust clip volume and cut out bloopers. Next, once all editing is complete, iMovie makes it super easy to upload videos into Youtube. Then, once the video is uploaded into Youtube all you need to do is copy the link and paste it into social media. To broaden the audience, I post it on every social media platform that I can. Students LOVE checking their views.
Editing in iMovie
PBL: Community Connection
A HUGE part of PBL is to show students real-world connections and give them an authentic purpose for learning. It’s also a great opportunity to get the community and local businesses involved.
Field Trip Opportunity:
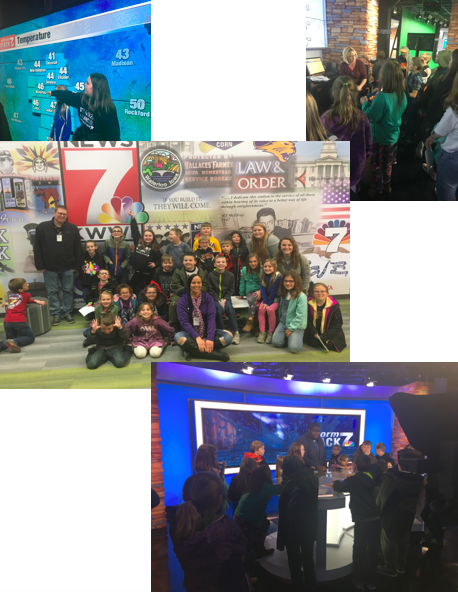
For this project, we took our students on a field trip to our local news station so they could see how the professionals create news broadcasts. Within this field trip, the students got to meet local news personalities, ask questions about the inner workings of creating a news broadcast, and got to interact with the newsroom green screen. Needless to say, the green screen was the highlight of our field trip. Before we began creating our own news broadcast we had the students analyze multiple professional and amateur news broadcasts so they recognized many of the on-air personalities and were SUPER excited to meet our local celebrities.
Since we could only bring up to 30 students on the newsroom tour and we had 100 students in 3rd grade, we worked out a visit to our school from our local weatherman. This connected to what they were learning in science class. Check out more information on PBLs here.
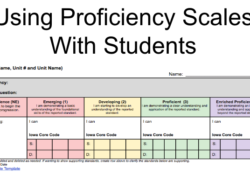
This is a learning lab about how to use proficiency scales and data binders in a high school math class. I am lucky enough to work with some pretty AMAZING teachers, including Mrs. Tapper, who teaches math in our high school. Our district is moving from traditional grading to Standard Referenced Grading (SRG). Mrs. Tapper is an early adapter in our high school and has been using proficiency scales and SRG with her students for a few years now.
This year all of our K-8 teachers are using proficiency scales and SRG with their students and are required to use SRG report cards. The goal for our high school is to fully implement SRG and proficiency scales by next school year. I conducted a learning lab with Mrs. Tapper as the host teacher so that other teachers could see how she uses proficiency scales with her students and how SRG works in her classroom.
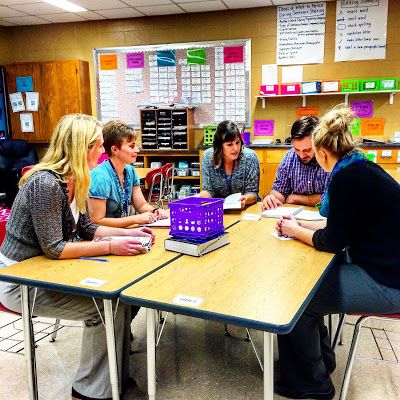
Learning Labs are a way of getting better together & creating a culture of collaborative learning. They are also a great way for teachers to see how different strategies work in real-time in other classrooms. Learning labs give teachers a visual model to teachers and are a great way to get even the most hesitant teachers to change. If they can see that a strategy works in one of their colleague’s classroom, they are more willing to try it in their own. Click here for more information on how to conduct a learning lab.
Pre-Brief: 10-30 minutes
The first step of a learning lab is the pre-brief. The pre-brief consists of a summary of what the participants will see during the visit. This could be in person or shared out in video form. I prefer sharing summary promo videos because it saves time and teachers can view it at their own convenience. Any teacher knows that teachers NEVER have enough time! Anything you, as a coach/facilitator can do to help save time will be greatly appreciated by teachers.
https://youtu.be/R-VGOMd5BqU
Prior To The Classroom Visit: 5 minutes
The second step of the pre-brief is to meet the participants outside of the classroom to summarize expectations, go through the protocol, norms, look fors and focus questions. For this particular learning lab, I handed out the learning lab protocol recording sheet, proficiency scales, aligned assessment and the student goal sheet that they were going to see the students using.
Focus Questions:
To keep the learning lab focused, the facilitator and host create specific questions that the participants will answer throughout the learning lab. This one was focused on how proficiency scales were used with students in a high school math classroom. We used the following focus questions:
How can we use proficiency scales with the students to get them to take charge of their own learning?
Do the students understand what level they need to be in order to be proficient?
How do the assessments match up to the proficiency scales?
How are the proficiency scales used to guide instruction?
Look Fors:
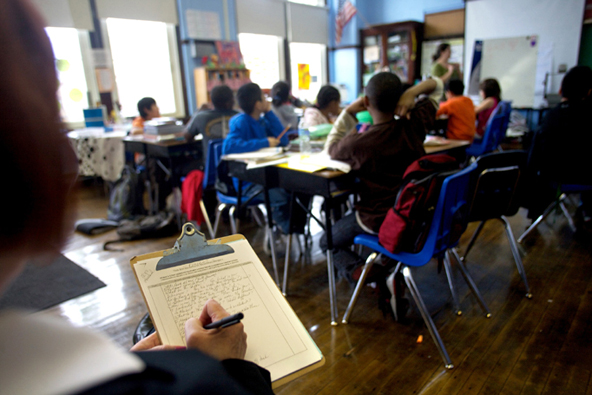
During the classroom visit piece of the learning lab, the participants use a recording sheet to record their observations on specific look fors. Their goal is to collect evidence for the look fors and focus questions. For this particular learning lab, there were three look fors.
What students are putting in their data binders.
. How the students are using their proficiency scales with their assessments.
How the proficiency scales/assessments are used for reteaching.
The group observes the instruction in a guided classroom visit format. While observing, the participants take notes that are specific to the focus question and look for’s. Participants use the Learning Lab Note-Taking Tool (We will use this for the debrief) created for them to record their observations. All of the look fors and focus questions were based on how students in the high school math classroom used their proficiency scales within their learning of math content.
Participants MUST follow the Learning Lab Norms.
Post-Brief: 30-60 minutes
The post-brief takes place after the classroom visit. The participants meet with the host teacher and facilitator to reflect on their findings, ask questions. The post-brief follows a specific protocol and is held in a whip-around format. The post-brief consists of four rounds. The first two rounds are based on thoughts from the learning lab participants about what they saw in their visit based on how students use proficiency scales.
The host teacher holds their thoughts until round three.
The facilitator takes notes during all four rounds of the post-brief.
Round 1: Student Evidence
The first round of the learning lab focuses on discussing student evidence collected during the classroom visit. Participants share the evidence they collected that met the look fors and focus questions in a whip around fashion using one of the following discussion stem options:
I saw…
I heard…
Round 2: Implications
The second round of the learning lab focuses on the broader implications for the participants. Based on the participant’s observations, what does it mean for their teaching? What can they take away from their observations to implement in their own classrooms? What can they take away to use to use proficiency scales with their students? Learning lab participants use one of the following discussion stem options:
Based on _______, I think….
Because I saw _______, I wonder if…..
Round 3: Response From The Host Teacher
The third round of the learning lab focuses on the host teacher’s responses to what has been shared thus far. How has the host teacher’s thinking changed? What is a future goal for instruction? How will student learning be assessed? The host teacher responds using the following discussion stem options:
I feel….
From what I heard, I’m thinking…..
My next step would be….
Round 4: Next Steps & Support Needed
The final step in the learning lab protocol is the debrief. This is where the participants share the next steps for their own work that arose from the observations. Participants share ah-ha moments, takeaways and new learning that will influence teaching in their own classrooms. The facilitator takes notes for future follow-up and coaching and support needed. The learning lab participants respond using the following discussion stem options:
A goal I could set for myself is…..
One or two aspects from the observation that I could use in my own instruction are….
I realize my students….
I would like to try….
I need help with…
Resources:
I learned a lot from my research on standard-referenced grading and proficiency scale creation through researchers like Robert Marzano, Ken O’ Connor, John Hattie, Tom Guskey and Rick Wormeli. If you are interested in learning more about SRG and proficiency scales, I definitely recommend the following books.
For more information about Learning Labs click here!
Learning Labs are guided classroom visits with look fors and focus questions. They are led by classroom teachers and facilitated by an instructional coach. Learning Labs consist of a pre-brief, a classroom visit and a post-brief. Learning Labs are a way of getting better together, a chance to learn from one another and a chance to see your colleagues in action. Learning Labs are great for creating a culture of collaborative learning and are great for moving even the most resistant teachers along. Learning labs are a great way for teachers to learn from their colleagues. They also give teachers a visual model of new strategies.
Learning Lab Resources:
I LOVE Diane Sweeny and her student-centred coaching. I used the following resources to get started in conducting my first learning labs. Diane Sweeny Facilitating Coaching Labs.
We, as educators, are so confined to our own classrooms that we do not get to see the great things happening right next door or across the hall. The purpose of learning labs are to get teachers into other classrooms to learn from one another. To deepen understanding, improve practice, and increase accuracy through collaboration. Influence teachers to continually be willing to improve their teaching for the ever-higher achievement of students. Learning labs focus on a specific topic and are guided with specific focus questions and look fors designed by the facilitator.
Learning Lab Planning
To design a learning lab there are a few planning steps that need to happen before the learning lab can take place.
Step 1:Choose A Specific Focus
The first step of designing a learning lab is to find a specific focus based on the needs of teachers. Chose a focus based on something that other teachers need and could benefit from seeing in action. The key to finding a topic for a learning lab is to listen to teachers.
Learning Lab Topics:
Learning labs can be focused on any topic from classroom management to new instructional strategies. I have facilitated learning labs on classroom management, explicit teaching, co-teaching, student engagement, questioning, math centers, literacy structure (Daily 5), new curriculum, new district initiatives like SRG (standards-referenced grading) and PBL (project-based learning) and social-emotional learning. I am lucky to work with some pretty awesome rockstar teachers who are willing to step outside of the box and host learning labs, which may not be in their typical wheelhouse. The key in running a learning lab is to find those early adopters who are not afraid of inviting visitors into their classroom.
Step 2:Find A Host Teacher
The second step in designing a learning lab is to find a host teacher. This should be a teacher who will be a great model of the focus, who is willing to host a learning lab by allowing others to learn from them and is respected by their colleagues. Visit their classroom while they are implementing the learning lab focus to ensure the strategy is ready to model. This will help you in designing specific look fors and focus questions and give feedback to the host teacher.
Host Teacher Video:
I like to video the host teachers (with their permission) during this initial visit and meet with them to watch the video for reflection that same day. This is also the time to suggest improvements or tweaks if necessary and plan a time for the lab. This video will also be used in the learning lab promo that will be used to advertise for the learning lab. After the reflection, I ask the host teacher to video them summarizing the strategy they will see during the learning lab as well as to invite teachers into their classrooms.
Step 3:Advertise
https://www.youtube.com/watch?v=7OiWQSQf9wo
The third step in designing a learning lab is to advertise. I like to create promo videos which include recordings of the strategy in action in the host teacher’s classroom. The promo video also includes an explanation of the strategy from the host teacher along with an invite from the teacher into their classroom. In addition, I include a summary of the learning lab protocol along with the exact times and dates the learning labs will be taking place along with the date and time of the post-brief reflection. Email the promo to all teachers who would benefit from attending the learning lab. In the email, I also ask that they email me back if they would like to attend so that I can get a count to prepare materials and figure out how many labs I would need to conduct.
If there is a large interest, multiple learning lab options may need to be scheduled. I suggest keeping the learning labs small (5-7 visitors) so that there is minimal interruption within the classroom.
The learning lab may be targeted to specific teachers selected by the administration but I would suggest as an instructional coach to offer it to multiple teachers so that those targeted teachers don’t feel they are being singled out. The job of an instructional coach is non-evaluative. I would also advise that as a coach, stay out of any aspects of targeting or singling out any teacher. If the administration wants specific teachers to attend the learning lab, they should communicate with that teacher privately. As a coach, I don’t like to know if specific teachers are targeted for learning labs.
Step 4:Get Materials Ready
The fourth step in designing and organizing a learning lab is to get the materials ready. The teachers will use a learning lab recording form to record their observations on the focus questions and look fors. Make sure to keep the focus questions and look fors to a minimal. I suggest 1-4 look fors and 1-4 focus questions. During this step, I also find coverage for any teachers who need it in order to participate in the learning lab. Sometimes I have to get creative on this. If you are having difficulties, make sure to talk to the teacher who wants to attend, they will sometimes have a solution that you haven’t thought of. I would also suggest working with the administration on this part.
Click here for a link to my editable learning lab protocol.
Learning Lab Process
Pre-Brief:
I use the promo video as the first part of the pre-brief, which I send out a week before the learning lab will take place. Then, I Invite teachers to meet me outside of the classroom a few minutes before the lab is set to start. Next, I go over the look fors and focus questions that they will be looking for as well as the norms of the learning lab. This will prepare teachers to know what is expected of them in the classroom during the visit.
Learning Lab Norms:
Reminder to learning lab participants: During a learning lab, you are only going to get a snapshot of teachers and students in action. The goal is focusing on what you observe during a specific interval of time. All notes and reflections are confidential. Please record evidence and facts only based on the learning lab focus, keep opinions out of it and follow the norms below when you enter the classroom.
Maintain a positive attitude and respect for lab host.
Avoid being a distraction in the classroom.
No talking to students or other teachers during the observation. Please save conversations so all can hear and participate.
Maintain silence and do not take it upon yourself to teach students.
Stay close to the action so you can see and hear what students are doing as learners.
Record detailed notes that are aligned with the focus questions and look fors to use during the debriefing session.
Classroom Visit:
Once the pre-brief complete it’s time to visit the classroom. I give the learning lab participants a copy of the learning lab protocol with the norms, look fors and focus questions along with space to record observations along with a clipboard and writing tool if needed before we enter the classroom.
Post- Brief
This is one of the most important components of the learning lab. The group debriefs in the following rounds. Throughout each round, the facilitator ensures that the responses are specific and objective and do not include feedback or suggestions. Each round is done as a “whip-around” so that the discussion moves in an orderly fashion from one person to the next. Participants may pass when it is their turn to speak.
Round One: Student Evidence:
What specific evidence did you see/hear regarding the focus question and look fors?
“I saw . . .” or “I heard . . .”
Round Two: Implications
Based on your observations, what are the broader implications for all students and instruction in general (not just in this classroom)?
What does this mean for your teaching and learning?
Conversation Stems
“Based on _____, I think _____”
“Because I saw _____, I wonder if _____”
Round Three: Response from the Host Teacher
The host teacher responds by thinking aloud about the strategy modeled.
How has the host teacher’s thinking changed?
What is a future goal for instruction?
How will student learning be assessed?
Conversation Stems
“I feel… ”
“From what I heard, I’m thinking…”
“My next step would be…”
“Student learning will be assessed by…”
Round Four: Next Steps for Participant Instruction and Support Needed
In a whip-around, each participant states the next step for his or her own work that arose from the observation. The facilitator takes notes for future follow-up and coaching.
Next steps
Takeaways
New learning
Aha moments that will influence your teaching within your own classroom
Conversation Stems
“A goal I could set for myself is . . . “
“One or two aspects from the observation that I could use in my instruction are . . .”